The File Sharing option with Microsoft has been improved a lot during the past few years. You only have to click once or twice to make your files visible to other users in the same network. Furthermore, now you can share files not only with Windows computers and with Android phones too. Sounds fascinating, right?  But this file-sharing option can stop working sometimes. Or else you won’t be able to view your files on other devices in the correct way.
Fortunately, there are several ways to fix that. Today we are here with seven solutions to fix the nonfunctioning file sharing in Windows 10. Stay with us!
1. Restart your PC
This is the very basic thing to do if you have encountered any issue. So, just restart the computer if you haven’t tried yet.
2. Use File Sharing properly
In order to share files, you should follow the steps correctly. You have to enable File and Network Sharing first. Then you can share the files. Here’s how:
Enable File Sharing
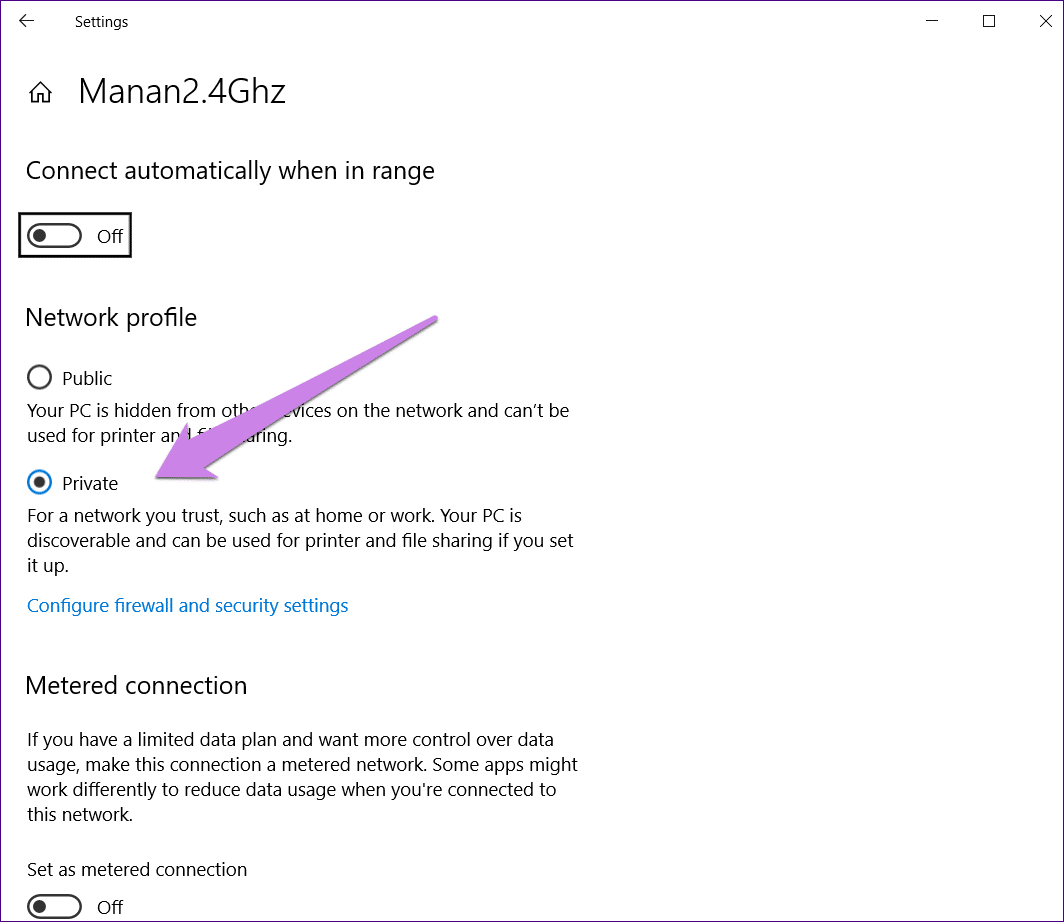
Usually, file sharing is enabled by default on Windows 10 for private networks. But there will be no harm of checking that again, right? So, let’s confirm that.
- First, search for Control Panel in Windows Search and open it.
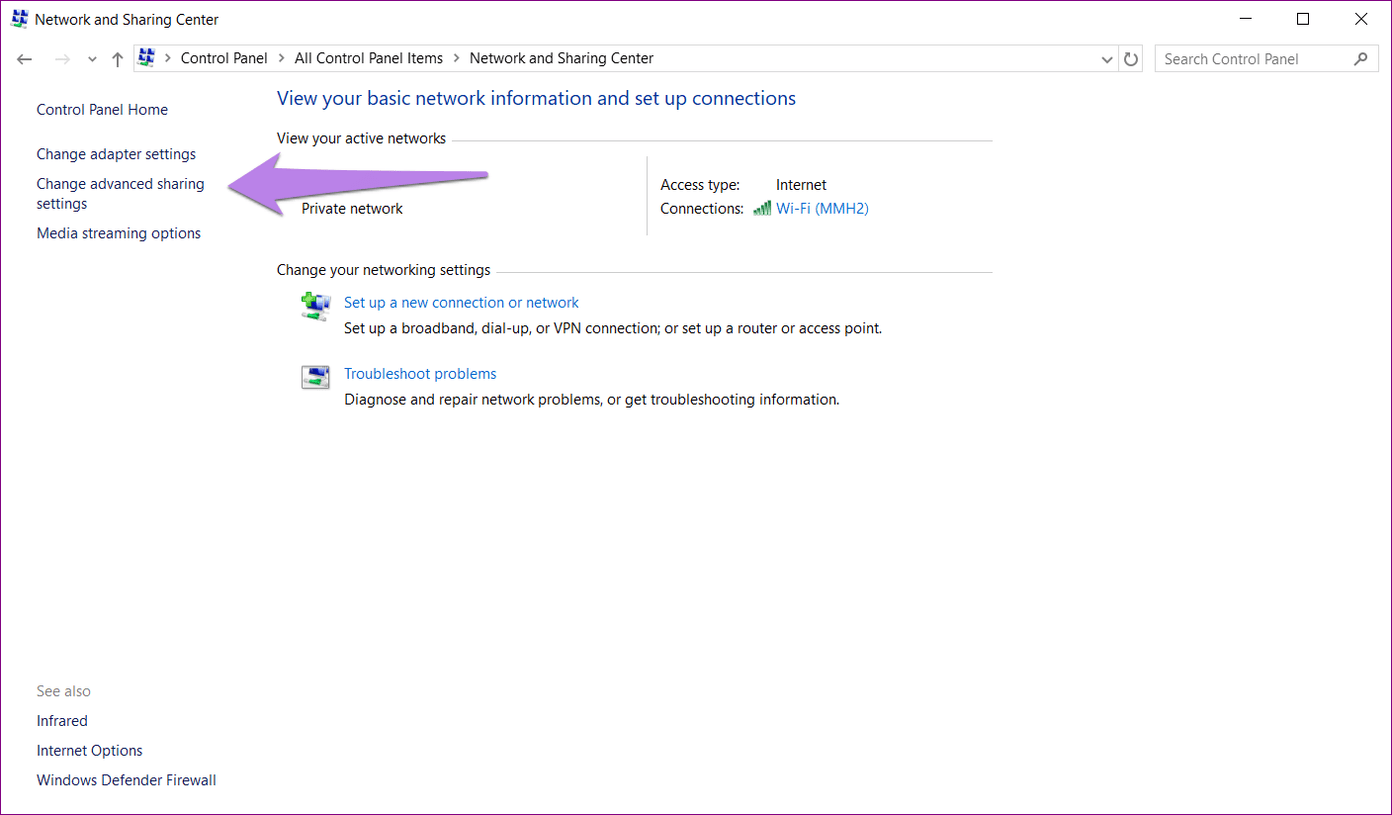
- Then click Network and Sharing Center.
- Click Change Advanced Settings which is on the left sidebar.
- Next, go to the Private (current profile) and confirm whether the Turn on network discovery and Turn on file and printer sharing are checked.

Note: We recommend you to go to Guest or Public too and turn off both settings just like you did before. That will disable file sharing in public places.
Share Files
You have to keep in mind that the enabling process only won’t give access to all your files to the computers on your network. You have to share the files manually like this.
- First, right-click on the item that you want to share and click on Properties.
- In that section, go to the Sharing tab and then click Advanced Sharing.
- Then enable Share this folder, click Apply, and then OK.
This will make your folder visible to all the users in your local network. If you want to share the files with some selected people, click Share as you previously did and select the users you want to share from the drop-down box.
Note: By default, the permissions are set for read-only. So, others won’t be able to modify the folder. You can change the permissions by clicking on Permissions.
Verify if the folder is shared or not
First, you can right-click on any folder and go to Give access to. There you will see the Remove access option. However, that doesn’t indicate that the folder is sharing at the moment. That’s how the default is.
In order to verify a folder is currently sharing, you can right-click on the particular folder, go to Properties. Next, click the Sharing tab. In that window, under Network File and Folder Sharing, the Shared label will be shown.
3. Turn off and on the password protection
If you have already enabled the Password protected sharing, other users need to have a user account on your PC or they should know your username and password. Therefore, you can try disabling this to fix the issue.
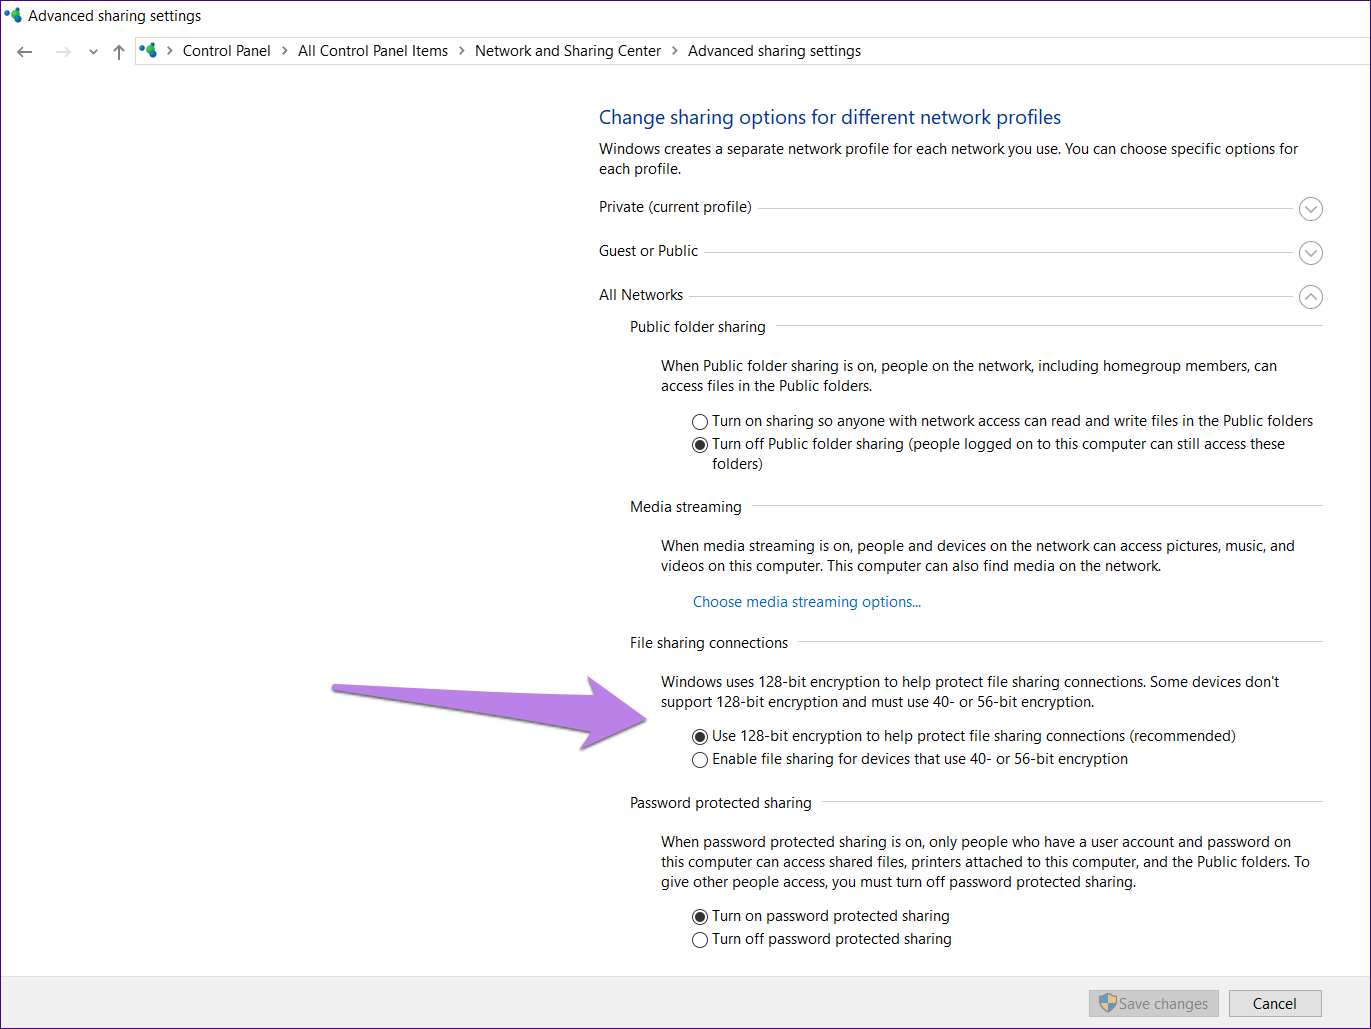
Go to Control Panel > Network and Sharing Center > Change advanced sharing settings.
Then check the box next to Turn off password protected sharing under All Networks.
4. Use correct login details
You must make sure that you are entering the right password on other computers. To avoid any mistakes you can try with both local username and password and your Microsoft account details. And to confirm the username you can go to C Drive followed by users. You will see the Users folder.
5. Switch between file-sharing connections
Even though the recommended encryption is 128-bit, some devices support 40 or 56-bit encryption. Therefore you can try switching in between them to fix the issue. Follow me!
- First, open Control Panel > Network and Sharing Center > Change advanced sharing settings.

- Then the File sharing connections will be there under All Networks. You can try both options alternatively.

6. Allow file and printer sharing in firewall settings
Just go with the steps.
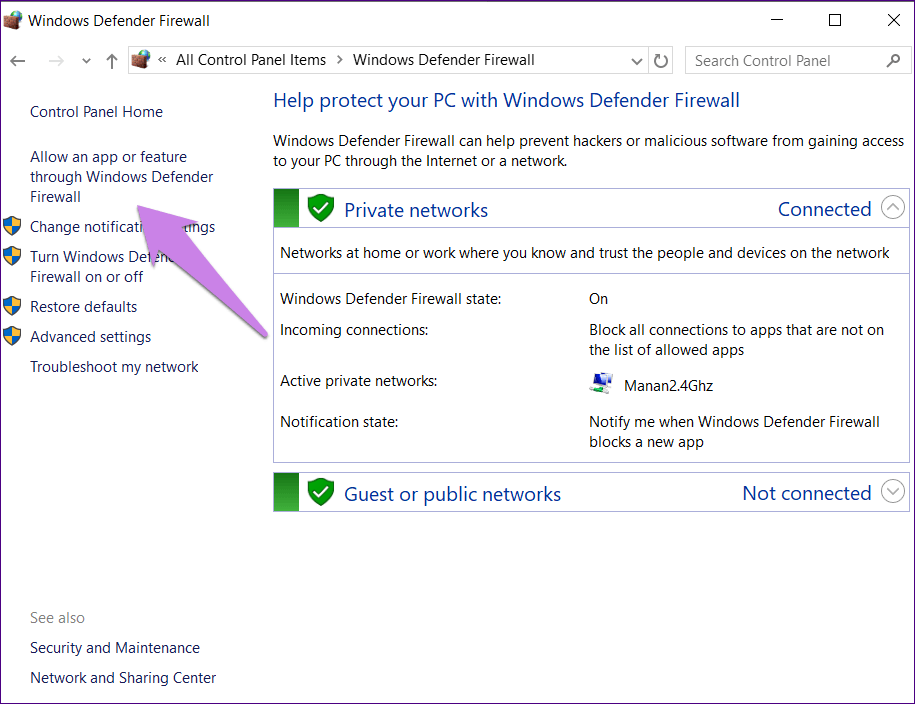
- First, go to the Control Panel > Windows Defender Firewall.
- Then click on Allow an app or feature through Windows Defender Firewall.

- Confirm whether the File and Printer Sharing is enabled in the list.
Note: You can also attempt disabling the Windows Defender temporarily to fix the problem.
7. Disable antivirus on your computer
In some cases, the antivirus may be the reason behind the file-sharing issue. So, you can try disabling it for a short period of time and see. If the issue is gone after disabling the antivirus you can consider updating it or go for a new one.
How to identify shared folders
To identify currently sharing folders, you can type \\localhost in the address bar of the File Explorer and hit enter. Or else you can go to the Network which is from the left panel in the File Explorer and click on the name of your PC.
Sharing between PC and smartphone
If you have an Android and trying to share files with your PC there are many third-party apps to help you.


