Sleep Mode doesn’t work on Windows 10
Sleep Mode in Windows. It was there in the past, it is there in the present and will be present in the future also. The main purpose of the sleep mode is to shut down HDD and computer monitor after a certain period to avoid unnecessary power consumption.  What if your PC won’t go to sleep on Windows 10? Let’s find out. I am going to give you all the possible solutions to fix the problem. The only thing you have to do is follow them in the given order.
- Confirm whether the sleep mode is enabled
- Scan for viruses
- Remove peripheral devices
- Disable Hybrid Mode
- Change Advanced Power Settings

1. Confirm whether the sleep mode is enabled
First, we will confirm whether the Sleep Mode timeout is enabled. I am pretty sure that most of you are not aware of these kinds of minor changes made after every system update.
Therefore, if you updated Windows recently just check the Power Plan settings. There might be something changed accidentally. To check that just follow these steps,
- First press Windows key + I to open the Settings app
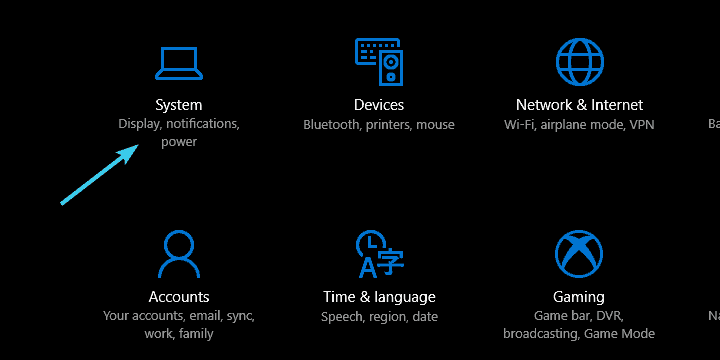
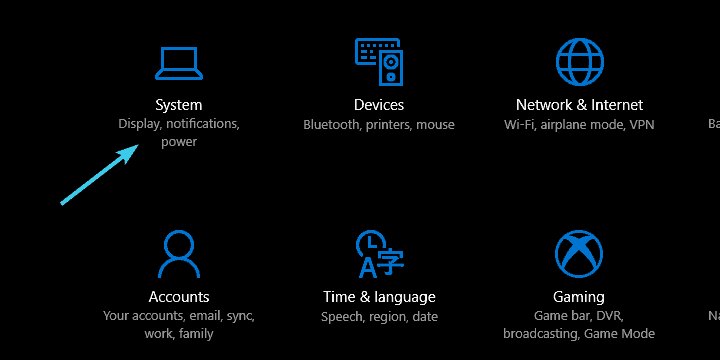
- Select System

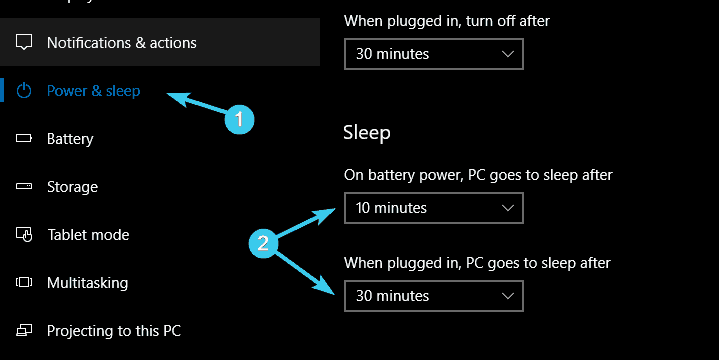
- From the left pane choose Power & Sleep
- Edit the values accordingly which are under the Sleep section and exit

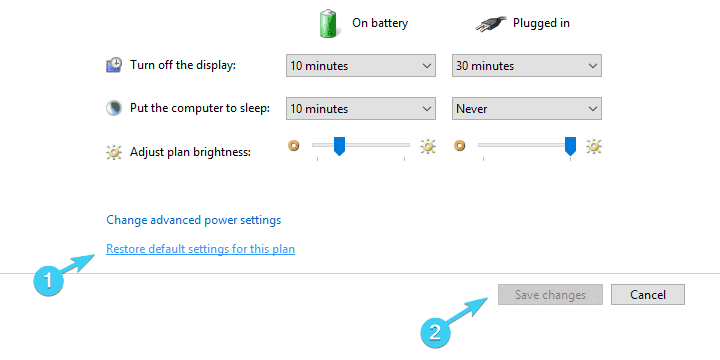
Restoring the Advanced Power Settings for the active Power Plan would also help. You can do that by following these steps.
- Press Windows key + I to open settings
- Choose System
- Select Power & Sleep from the left pane
- Then click in the Additional power settings in the top right corner

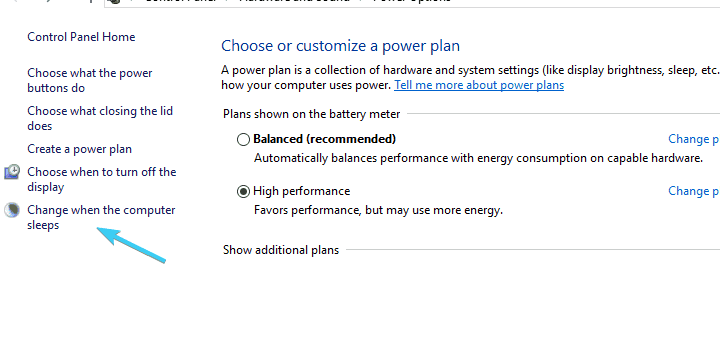
- After that choose “Change when the computer sleeps”

- Click on the “Restore default settings for this plan”
- Finally, save the changes

2. Scan for viruses
Some users have reported that some malware was preventing their computer from going into Sleep or Hibernation.
So, for the scanning process, you have to perform a deep system scan using a third-party antivirus or Windows Defender. By doing that, you can be sure that the malicious software is not the reason behind the Sleep Mode issues.
As the scanning process is different with different third party solutions, we are using Windows Defender for the demonstration purposes.
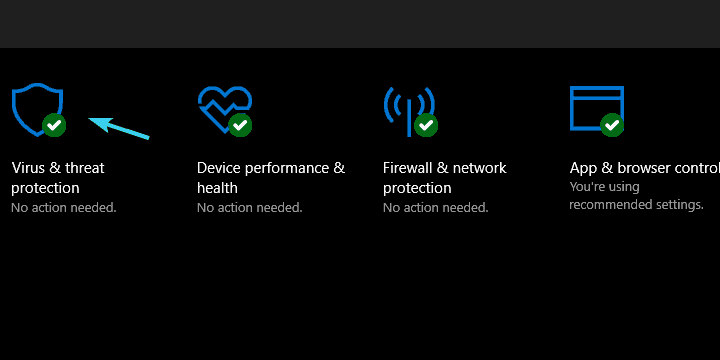
- First open Windows Defender from the notification area
- Then choose Virus & Threat Protection

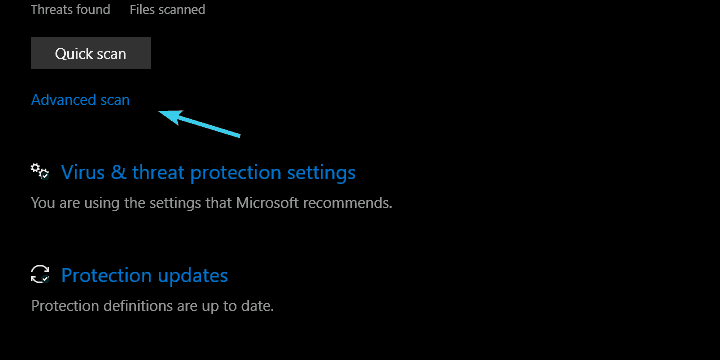
- Click on Advanced Scan

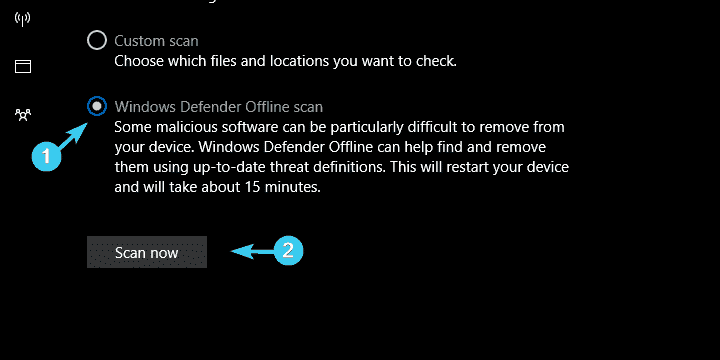
- Select the Windows Defender Offline Scan, click Scan Now button

- Then your PC will restart and the scanning will be started
3. Remove peripheral devices
Peripheral devices might be another reason which prevents your PC from going to Sleep Mode. Usually, a mouse or a keyboard won’t cause these kinds of problems. But webcams, printers, or SD readers will.
Similarly, you have to remove DVDs from DVD-ROM of they are not in use. Once you unplug all the peripheral devices the problem will be gone.
Still, you have the problem, please move to the next step.
4. Disable Hybrid Mode
The Hybrid Mode is the combination of Sleep and Hibernate power saving modes. It is mainly used to resemble hibernation power-saving traits while maintaining the loading speed of the Sleep mode.
Even though Hybrid Mode is a great option, not every motherboard supports that. In simple terms, if you have enabled Hybrid Mode in an older PC there is a high chance that your PC won’t go to sleep.
So, let’s fix this.
- First, press Windows key + I to open Settings
- Choose System

- Go to the left pane and select Power & Sleep
- Then go to the top right corner and click Additional Power Settings

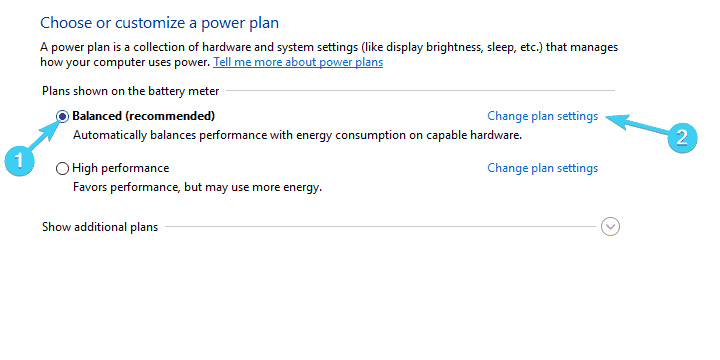
- From there select the preferred Power Plan you are using and click Change plan settings

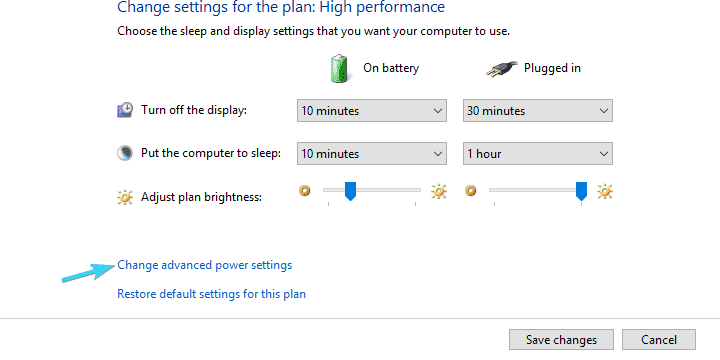
- Click Change advanced power settings in the next window

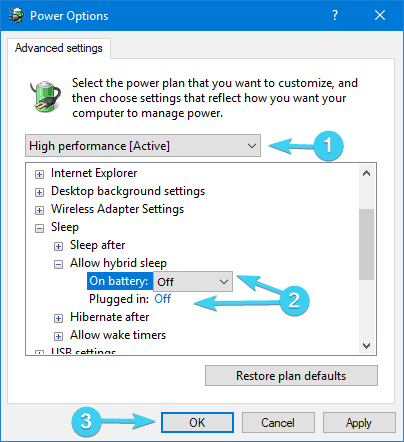
- From the tree menu, expand Sleep
- Then expand Allow Hybrid sleep and turn it OFF
- Finally, save the changes

If you are still facing the problem after doing all these, here is the last solution.
5. Change Advanced Power Settings
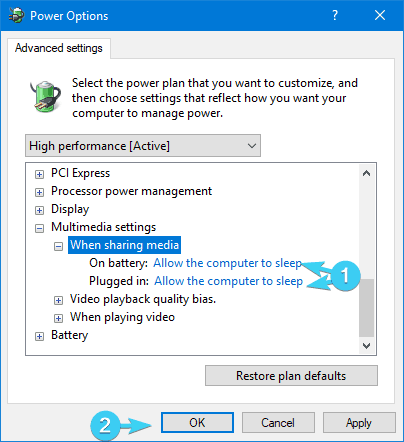
There are some options that are overlooked when it comes to Power Plans and their advanced settings. The Multimedia sharing option and Multimedia sharing are examples of such.
These features will prevent your PC from sleeping when you stream something on your PC like YouTube videos. Usually, this is enabled by default. So, we recommend you to disable it to fix the problem.
Just follow me!
- Press Windows key + I to open Settings
- Choose System

- Select Power & Sleep from the left pane
- Go to the top right corner and open Additional power settings

- Click Change plan settings

- Then click advanced power settings

- Expand Multimedia settings
- Edit When sharing media option to Allow the computer to sleep
- Finally, confirm the changes

Connect with us
We would like to hear about your problems, questions, and suggestions. So feel free to contact us. This is free of charge service that we offer. But we receive thousands of emails per day. So it is impossible to reply to all of them. So we create a Community to help you individually. Go to Community and open help Topic under the relevant category. Please spread this post to your friends by sharing Facebook and other major social media. And make sure to like us on Facebook.
