As you are already aware, PHP Composer is an application that is used to track dependencies for a project. Unlike apt or yum it won’t replace system package managers. Basically, it allows you to select a set of libraries for a specific project and thereby identify the versions and dependencies and installs them.
In this guide, I am going to show you how to install and start with PHP Composer in Ubuntu 18.04.
Pre-requirements
- A Ubuntu 18.04 Linux System
- PHP 5.3.2 or later installed on Ubuntu
- Sudo privileged user account
- Access to a command line/terminal window (Ctrl + Alt + T)
Steps to install PHP Composer on ubuntu
Once they are fulfilled, just follow these steps.
Step #1
Update the Local Repository
The first step is to update the local repository lists. Just enter the following command:
sudo apt-get updateStep #2
Download the Composer Installer
You can use the following command to download the Composer Installer:
php -r "copy('https://getcomposer.org/installer', 'composer-setup.php');"Step #3
Verify the Integrity of the Download
First, visit the Composer Public Keys page. Then copy the Installer Signature (SHA-384). After that set the code shell variable to:
COMPOSER=48e3236262b34d30969dca3c37281b3b4bbe3221bda826ac6a9a62d6444cdb0dcd0615698a5cbe587c3f0fe57a54d8f5Now, run the script below to compare the official hash with the one you downloaded previously:
php -r "if (hash_file('SHA384', 'composer-setup.php') === '$COMPOSER) { echo 'Installer verified'; } else { echo 'Installer corrupt'; unlink('composer-setup.php'); } echo PHP_EOL;"Next, the script will tell you whether the Download is verified or it is corrupted. You have to redownload the file if it is corrupted.
Step #4
Installation of PHP Composer
As the installation requires to curl, unzip and some other utilities first you have to install them using the following command:
sudo apt-get install curl php-cli php-mbstring git unzip
Install Composer as a command which is accessible from the whole system.
Then enter the below code to install to /usr/local/bin.:
sudo php composer-setup.php --install-dir=/usr/local/bin --filename=composerThe output will be:
All settings correct for using Composer
Downloading...

Composer (version 1.6.5) successfully installed to: /usr/local/bin/composer
Use it: php /usr/local/bin/composer
When the Installer is completed, verify the installation:
composer ––versionSo that the system will show you the installed version number.
Ex:
Composer version 1.8.6 2019-6-11 15:03:05Finally, run the following command to remove the Installer:
php –r “unlink(‘composer-setup.php’);”Basic Composer Usage
As I mentioned before, the Composer is developed to track dependencies on a per-project basis. That will facilitate other users to create the same environment.
The composer uses a composer.json file to keep track of required software and allowed versions, and a composer.lock file to maintain consistency. You will be able to automatically generate these files by using the require command.
First, open a terminal and enter:
mkdir c_sample
cd c_sample
Then you have to select a PHP package to load from packagist.org. For demonstration purposes, we are using the monolog/monolog package. Just follow the instructions. Or else you can search the website for monolog.
Important: Monolog is a package used to manage logfiles. The name before the slash indicates the vendor and the other indicates the package name.
Enter the below code in the terminal window:
composer require monolog/monologSo the system will download the software and will create the files. (composer.json and composer.lock)
When the process is finished you have to list the contents of the directory:
ls -lWhile doing that you will see the composer.json and composer.lock files with a vendor directory.
Enter this to see the contents of the composer.json file:
cat composer.jsonThen the system will show you that the monolog is added. The minimum version of the software will be indicated by the carat^ sign beside the version number.
How to Setup Autoloading
Normally PHP doesn’t load classes automatically. But you can configure it to do so. Then the work will be easier.
First, create a new file via text editor:
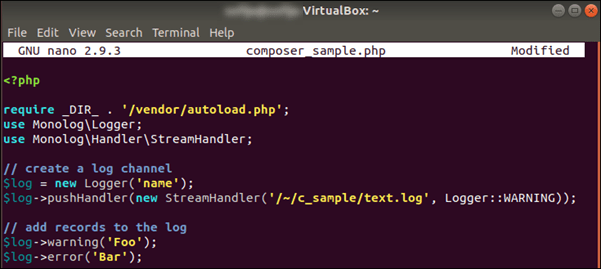
sudo nano composer_sample.phpThen enter the following to the file:
<?php

require __DIR__ . '/vendor/autoload.php';

use Monolog\Logger;

use Monolog\Handler\StreamHandler;

// create a log channel

$log = new Logger('name');

$log->pushHandler(new StreamHandler('/~/c_sample/text.log', Logger::WARNING));

// add records to the log

$log->warning('Foo');

$log->error('Bar');
After that write the file (Ctrl + O) and exit using (Ctrl+X). You are able to run the command to autoload monolog now:
php composer_sample.phpHow to Update Dependencies
Enter the following command to update all the dependencies in the composer.json file:
composer updateIn this case, the dependencies will be updated according to the version that is specified in the file.
You can enter the below command if you want to update them individually:
composer update vendor/package vendor_b/package_bThat’s it!