How to Extract Sony Boot.sin and get the Stock Boot.img File
Hello friends! I brought you another extracting guide. The title of the article is how to extract Sony Boot.sin file and get the Stock Boot.img File. I know that majority of you will now know the purpose of this article. For those who are confused, let me give a brief explanation about today’s article.
For an end-user, extracting the full potentiality of the device and gaining administrative privileges will be the high-end requirements. And rooting your device using Magisk will achieve both of them. Moreover, you can root a device using two different methods. Either flashing the Magisk app via TWRP or without using the TWRP recovery.
If you choose to root the device without TWRP recovery, you have to get the stock boot.img file, patch it using Magisk, and then flash it using fastboot commands. Even though this is a bit time-consuming, most users prefer this method. The main reason for that is most of the Sony devices don’t have a working TWRP recovery. And using a custom recovery is quite complex. Another thing you have to understand is that currently, OEMs don’t provide stock firmware files in a ZIP format.
They come in various formats. Payload.bin format in OnePlus and OZIP format in Realme and in Oppo. In Sony, the format is SIN. I got plenty of requests about how to extract this file format. So, I brought you this tutorial with detailed instructions.
How to Extract Sony Boot.sin and get the Stock Boot.img File
Before moving on I have to mention to you that, the steps are in separate sections. And you need to follow them in exact order without skipping a single step. And we don’t hold responsibility if anything happens to your phone.
Step 1 : Download Sony Stock Firmware
Before proceeding with the guide you will need to download the stock firmware for your Sony phone.
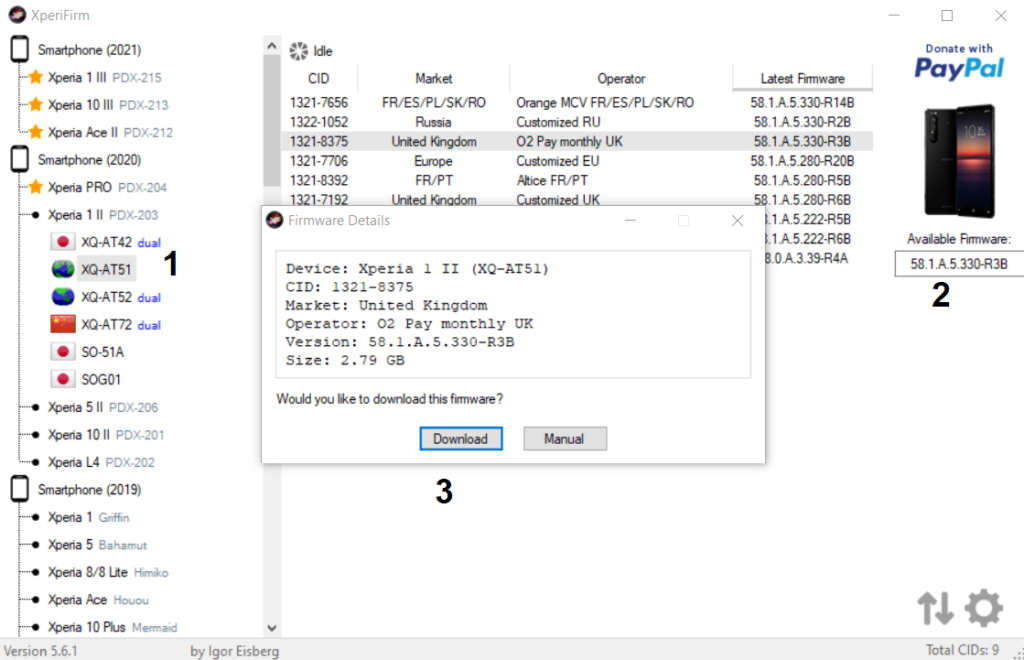
- You can use XperiFirm Tool v 5.6.1 for that. Just download the file and extract to a convenient location on your PC.

- Then go to the folder and double click on the XperiFirm-×64.exe file to launch it. If you are a 32-bit user you need to launch the ×86 file.
- Next go to that particular folder and region from the left menu bar. And click on the firmware version number at the right under the available firmware section.
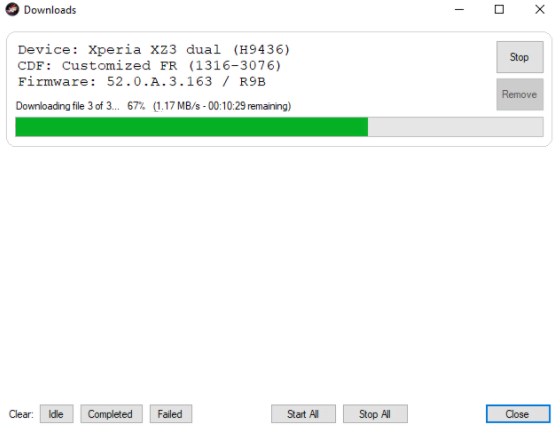
- Click the Download button and choose the download folder.

- You will see a message saying Unpacked Successfully when the process is completed.

- Now you can extract the downloaded firmware file to the PC.
Now with the firmware in the hand, we’ll move to the next step of this tutorial.
Step 2 : Extract Sony Boot.sin file and get Boot.img
- Firstly download the Sony Dump Tool.
- Then extract it to a convenient location on your PC.
- And transfer the boot.sin file to the folder where you extracted the Dump Tool.

- Now, create a new folder within the same folder and name it as output. So that the extracted file will be kept in that.
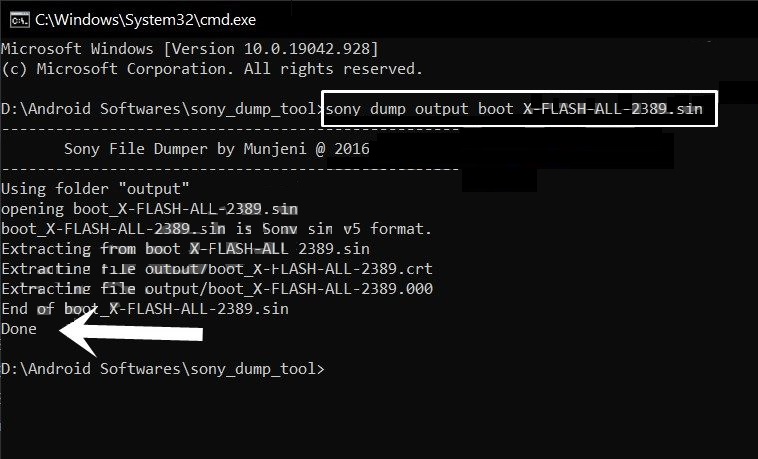
- As the next step, go to the address bar of the Dump Tool folder and type im CMD and press Enter. This will launch the Command Prompt.
sony-dump output bootfilename.sin- After that type the following command in the CMD window and press Enter. You need to replace the bootfilename accordingly. In the example, the bootfilename is boot_X-FLASH-ALL-2389. And the command is:
sony-dump output boot_X-FLASH-ALL-2389.sin
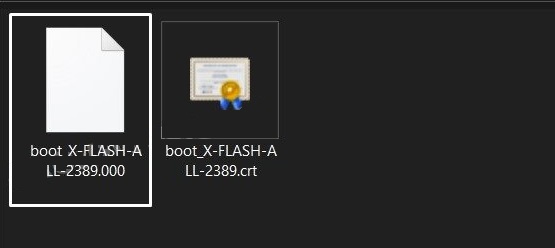
- Once done, the converted file will be under the output folder that you created before. You can go to the folder and see the boot file.
- Then you have to rename the file by adding .img to the end of the file name.

- Finally confirm the renaming process by clicking on Yes in the popup window.
That’s all! Now you have the boot.img file. And you can proceed with rooting.
Do you think this is helpful? If so, please share this article on Facebook, LinkedIn, etc. And we warmly welcome your queries, comments, and suggestions. Feel free to contact us.
You can join our community and open help Topic under Android.
It’s totally free! And, please don’t forget to like our Facebook page. Thank you very much! Have a nice day! 😊