
How To Fix ‘Missing A Temporary Folder’ WordPress Error
Today I am going to help you with another annoying WordPress error. That is the “Missing A Temporary Folder” error. That is one of the most frustrating errors as it may disrupt the entire website development and user experience. Fortunately, there is a simple way to fix the error.
The main consequence of this error is it doesn’t allow you to upload any file in WordPress. Similarly, you can’t upload any images or install any plugins and themes even.
When talking about fixing methods, there is a simple way by editing a few files on your server. Just by yourself. Let’s look into that.
What Is Missing A Temporary Folder Error?
Even though the solution is a simple one, explaining the “Missing A Temporary Folder Error” is quite difficult. Because it includes a lot of server-side folder permission systems and PHP settings and functions. 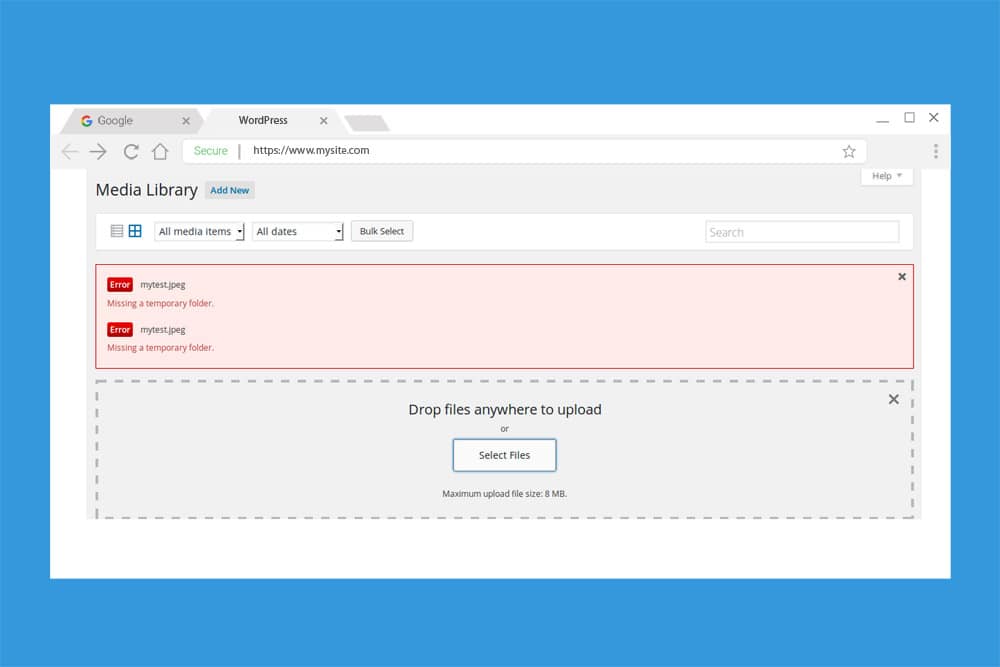 In a nutshell, the error is displayed when the “temp” folder is deleted from your server. That might happen accidentally by you or by a server malfunction. Another possibility is that as a result of folder permissions set by your hosting server.
There is a temporary folder in your website server, which is used to store the files that you upload before putting them in the relevant folder. Let’s take an example. Imagine that you upload a plugin, first, it will be stored in the temp folder till WordPress create a new folder for the plugin files in the WP-Content folder and store them permanently.
When the “temp” folder is disappeared, WordPress fails to go through the ordinary uploading procedure and will display the “Missing A Temporary Folder” error.
How to fix the Missing A Temporary Folder error?
To fix this error, you have to log in to your website server and then edit a core WordPress file. Before making changes to your server, first, you must backup your website. You can learn how to set up automatic backups in WordPress from this guide.
Step 1: Log in to your server
- Using an FTP client app like Filezilla
- Using the CPanel for web hosting service.
In this article, we demonstrate the steps using CPanel. The process is the same as the FTP client app also. First type /Cpanel at the end of your website’s URL.
Ex: yourwebsite.com/cpanel
Then log in to your server. Enter the username and password for Cpanel. Your hosting provider will give you the username and password. It’s in the welcome email you got when you signed up with the hosting platform.
Step 2: Locate the wp-config.php file
After logging into the CPanel, look for the File Manager app. Then open it.
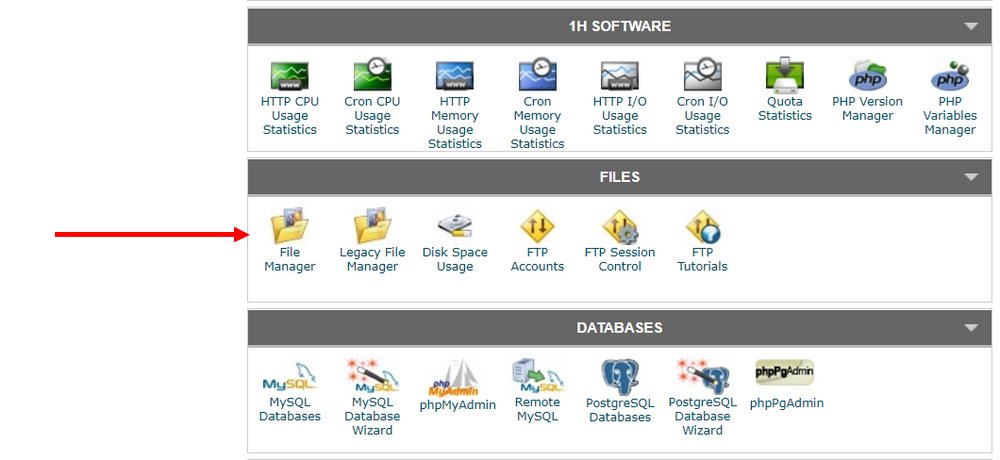
Then go to the public.html folder. You will see the wp-config.php file in there. That is a core WordPress file that handles all the configurations for the WordPress system.
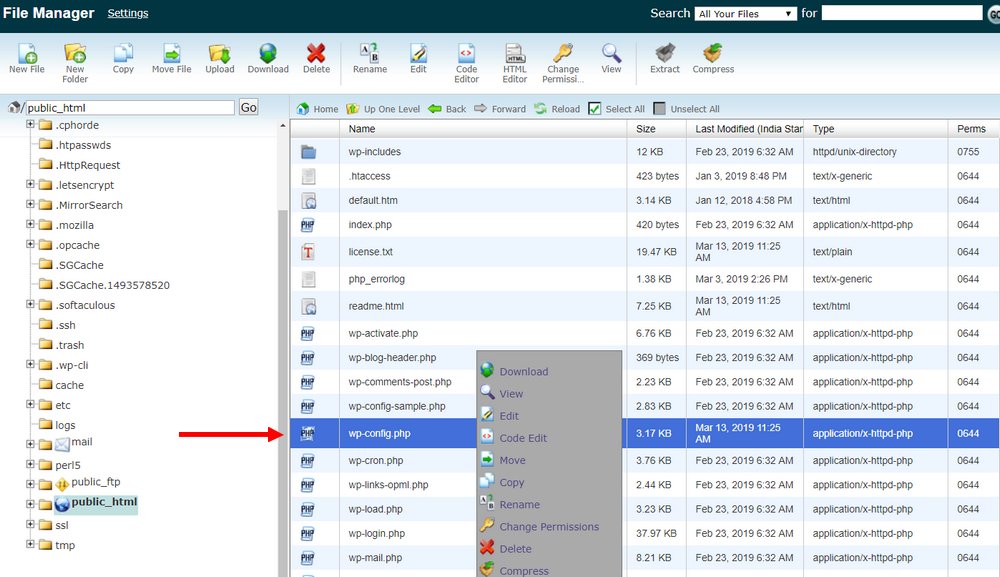
Then right-click on the wp-config.php file and just select Edit.
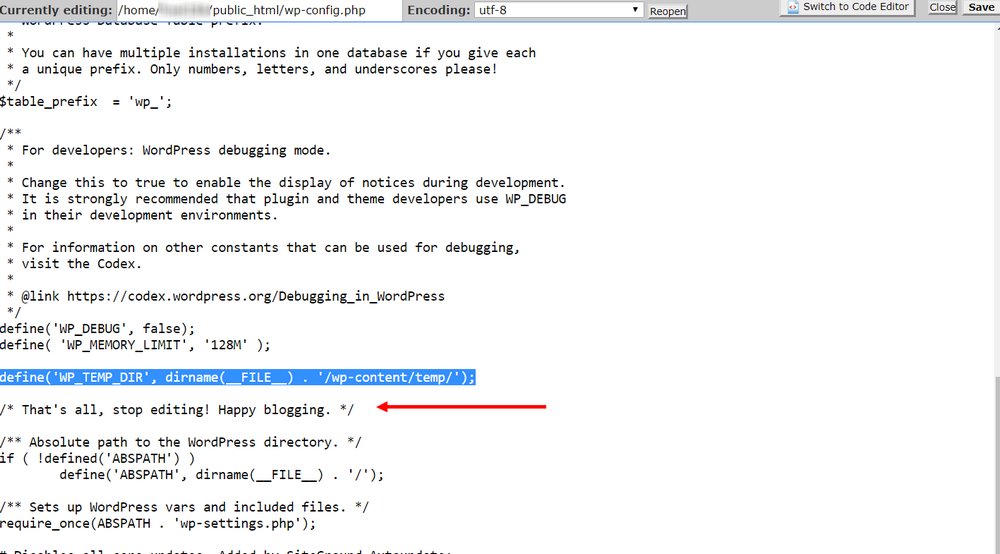
After that, copy and paste the following code just after the line that says “That’s all, stop editing! Happy blogging”
define(‘WP_TEMP_DIR’,dirname(_FILE_). ‘/wp-content/temp/’);
Then click Save.
These steps will define the location of the temp folder. So that WordPress will be able to locate it easily.
Step 3: Create the “temp” folder
Again go to the public.html folder and open the WP-Content folder.
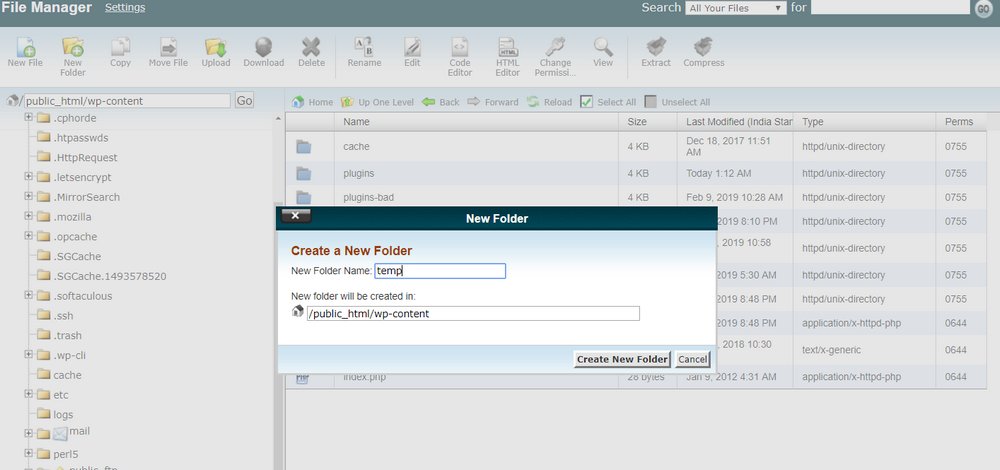
Then create a new folder inside the WP-Content folder and name it as “temp”
That’s it! You are good to go. You can try uploading a file to see the progress.
If the solution didn’t work for you, we strongly recommend you to contact the technical support team of your web hosting provider. Another fact is that commonly this error comes secondary to terrible web hosting configurations and management. To avoid such errors in the future and protect your website, you must consider moving your website to a managed WordPress hosting platform.