
How to Setup a professional Email address with Gmail and G Suite
A professional email address is very important for all business owners. It is essential to maintain a professional email address for a commercial website. It depicts reliability toward customers regarding the business. G Suite is Google’s productivity app that can use with Gmail. This article brings you a valuable guide on how to set up a professional email address with Gmail and G Suite. Hence it is very important to read this valuable article completely.
What is a professional Email Address?
A professional email address is an email address with the name of your company. If you use the name of your company as the email address for your commercial purpose, it shows a professional look and more trustworthy for customers. Firstly, it requires a domain name and a website to create a professional email address.
Why use G Suite for a professional branded Email address?
Some web hosting email servers are unreliable, restrictive, and anxious. Because of that, it has a doubt on whether the email you sent was delivered or not. At this point, G Suite and Gmail resolve your uncertainty.
Gmail is an industry leader with 1.5 billion active users per month. G Suite is used more than 4 million companies and 80 million students and educational institutes. So it is obvious that Gmail and G Suite must have some competitive advantages. You can find out them by reading the below list.
- Provide a professional business email address on your own domain.
- Give compact security and spam filters for Gmail.
- Ability to double the storage of the free Gmail account with 30 GB.
- Manage emails when offline using the Gmail app on mobile devices.
- Ability to work anywhere you have to name it such as web, mobile, and tablet.
- Work with Outlook finely and the ability to sync old Outlook accounts.
- Each user can have up to 30 email aliases.
- Facility to use Google calendar. Google Hangouts for chat, video, and voice calls on the business email address.
- Provide 24 hours service for all 7 days in the week.
- Ability to work with the WordPress site perfectly.
- High deliverability, no delays, and no ending up in the spam folder.
Setting up a professional email address with Gmail. (G Suite)
Now you will have some idea about the importance of having a professional email address. So you can set up your professional email address G Suite by following below steps finely.
- Signup for a G Suite account.
- Enter the name of the company and the country where you are located and the number of employees in the company. Here, you can select one user account for yourself or select the number of employees.

- Then click on the Next button.
- On the next step, enter your personal contact information including name and email address.

- Then click on the Next button.
- On the next step, if you already have a domain name you can click on “Yes I have one I can use” and if you have not a domain name, then you have to click on “No. I need one to register a domain name”.

- Then if you already have a domain name, you can continue to use your existing domain name after verifying the ownership of the domain name. Otherwise, you can process the registration of a new domain name with charges.
- Create the G Suite user account for you by entering a username and a password. Make a note that this username is the first professional email address of you. So you have to select a username that you require to use as the professional email address. Then create the G Suite account.

- Click on the Go to Setup button.

- On the next step, you can add more people to the account and create more accounts for employees and divisions. So then you can click on “I have added all user email addresses” and click on the Next button. However, it is better to add more users to the account and create an email address for employees according to the requirements.
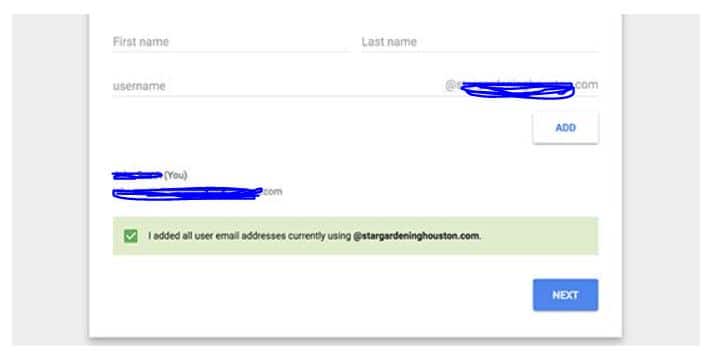
- Verify the ownership of the domain name.
- You will receive an HTML code snippet and it needs to add to your website.

- As well as you can verify the website ownership by uploading an HTML file to your website using an FLP client or file manager app in your hosting account dashboard.
- You can use the MX Record method if you do not have a website. You can follow the steps as per the given guidelines simply by processing the MX Record method.
- Switch to the WordPress admin area in a new browser tab.
- Install and activate the Insert Headers and Footer plugin.
- After the activation, you have to go for Settings and then for the Insert Headers and Footer page.
- Paste the HTML code under the ‘Scripts in Header’

- Click on the Save button.
- Switch back to the G Suite setup screen and click on the “I added the meta tag to my homepage” checkbox.

- Enter MX record entries for the domain name. However, you require to enter MX records for existing domain names and websites only. But you do not need to add MX record if you have registered your domain name via Google. Meanwhile, your emails will deliver to the domain name and not to the Google servers. The reason is that your domain name is not registered with Google.
- It requires setting up the right MX records on the domain name settings. Then Google server sends and receives emails for your company. Here this article explains how to add MX records in Bluehost. For that, you have to perform the below steps.
- Login into the web hosting account or to the domain registrar account.
- Login to the Bluehost hosting dashboard.
- Click on domains and on the next page, choose your domain name then click on the “Manage” link which in the DNS Zone Editor option.
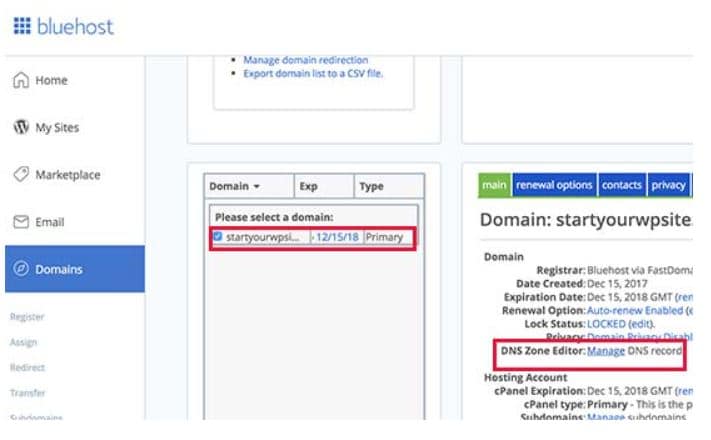
- It will appear as the DNS Zone editor.
- Switch back to the G Suite setup screen and check the box refer to “I have opened the control panel of my domain name”.
- It will appear the MX records and a link which include guidelines on how to add MX records to dozens of hosting and domain services provider.
- You have to enter details to Bluehost DNS settings as below.
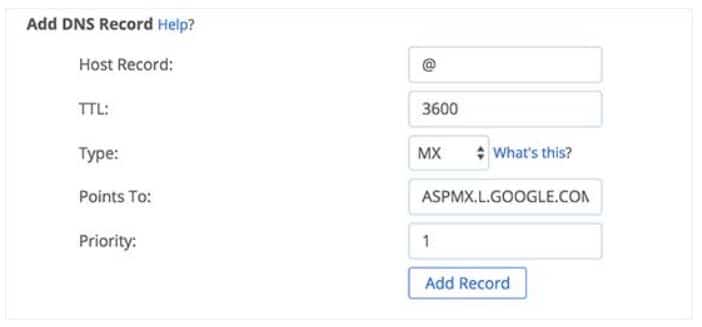
- Click on the Add record button and repeat the process to enter all five lines as MIX records.
- Then move to G Suite setup and check the “I created the new MX records” box.
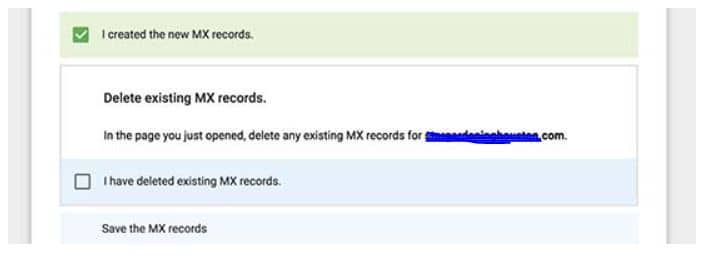
- Then you have to delete existing MX records which are still pointing to the website hosting or domain name register. To do that move to the DNS zone editor and scroll down to the MX records section. Then you can notice that previously created MX records are still pointing to the website.
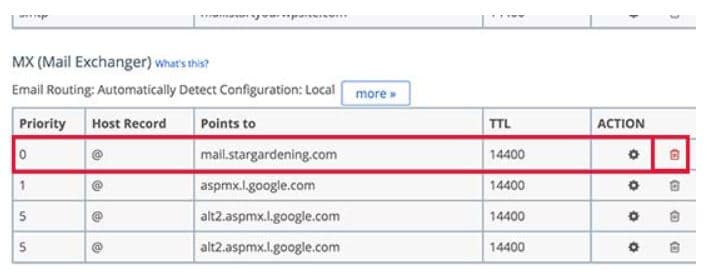
- Delete old MX records by clicking on the Delete button.
- Then move to the G Suite setup screen and check the “I deleted existing MX records” box.
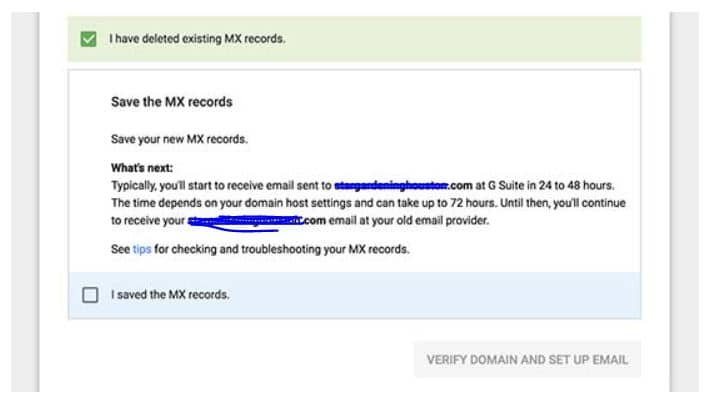
- Save the added MX records. Here, in some providers save MX records automatically while some are not saving automatically. Hence you have to save added MX records manually. After saved MX records then you have to check the “I have saved MX records in G Suite setup” box.
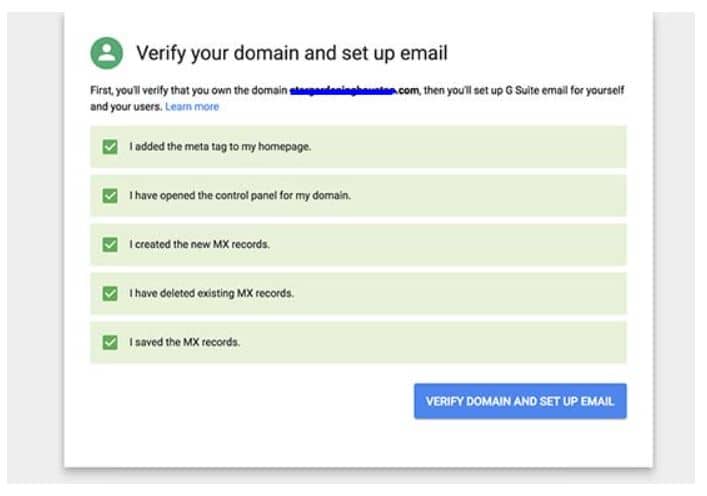
- Click on the “Verify domain and set up the email” button and then it will exit the setup wizard.
Using your professional email with G Suite and Gmail
Your email account will work similarly to other Gmail account. It can access the email account by visiting the Gmail website and then sign in with the professional email address. As well as you can manage the G Suite account through the admin console.
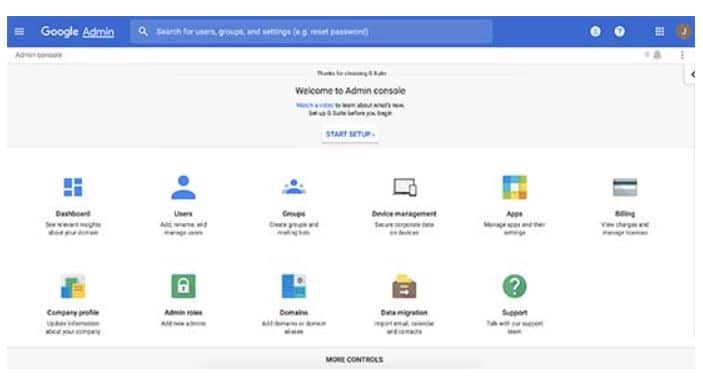
- In the admin console, you can add or remove new users and existing users. Each user belongs 30 GB storage and with other same features. Those users have not accessed the admin console and you can remove them at any time.
Troubleshooting G Suite domain setup.
G Suite has detailed documentation for web hosting providers and domain registration service providers. You can refer the article on setting up MX records (Hosts specific steps) and locate the domain registrar and or web host from the list. Then you can locate the domain registrar or web host from the list and if it is unable to find out your service provider from the list then you can ask from them to give instruction to set up G Suite for the domain name.
So this article may be very useful for all people who are engaging in businesses. Follow the guidelines finely and use them as fascinating with these new technologies in the business world.