Even though Ubuntu recommends upgrading a Server Edition installation with the do-release-upgrade command, part of the update-manager-core package doesn’t have any graphical dependencies. And it is installed by default even.
In this tutorial, I am going to help you to use the recommended upgrade method for Ubuntu Linux 16.04 LTS.
Main steps of the upgrade Ubuntu 16.04 to 18.04
If you are upgrading on a server system,
- First, log into the Ubuntu box
- Then patch the current system by running
sudo apt update && sudo apt upgrade - Make sure either the UFW firewall is temporarily disabled or TCP port 1022 is open after reboot
- Then run
sudo do-release-upgradeto upgrade - After that follow on-screen instructions to complete the upgrade
Now let’s clarify each step further.
How to upgrade from Ubuntu Linux 16.04 to 18.04
To upgrade the existing system, type the apt command or apt-get command:
$ sudo apt update
$ sudo apt upgrade
If the kernel is updated, reboot the Linux box
$ sudo reboot
If you are having a ufw firewall running on ufw, then open ssh port 1022 via the following ufw syntax:
$ sudo ufw allow 1022/tcp comment 'Temp open port ssh tcp port 1022 for upgrade'
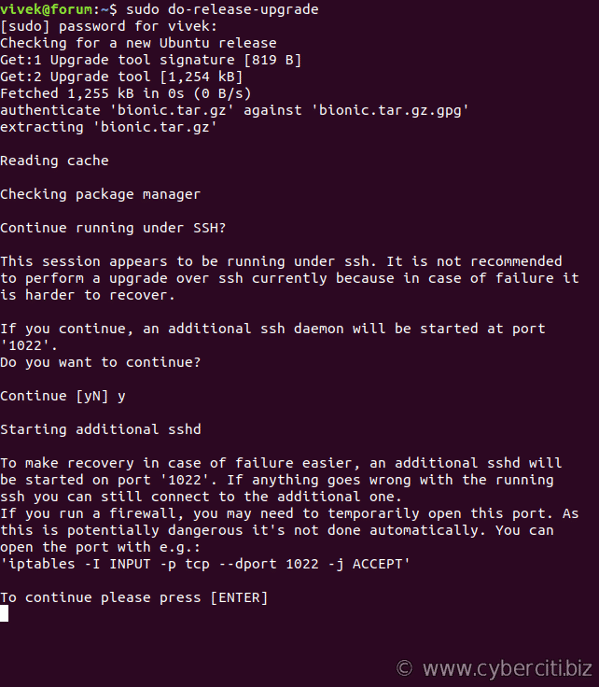
How to upgrade to Ubuntu 18.04 LTS using do-release-upgrade
Type the following command to upgrade the operating system to the latest from the command line:
$ sudo do-release-upgrade
 Then follow on-screen instructions. During the process, you will be asked to replace the existing grub or ssh config file. In order to avoid problems, you have to select keep the existing version.
A few moments later you will see a message telling you the “System upgrade is complete”. Then press y to restart your system in order to load updates kernel and operating system for your cloud server.
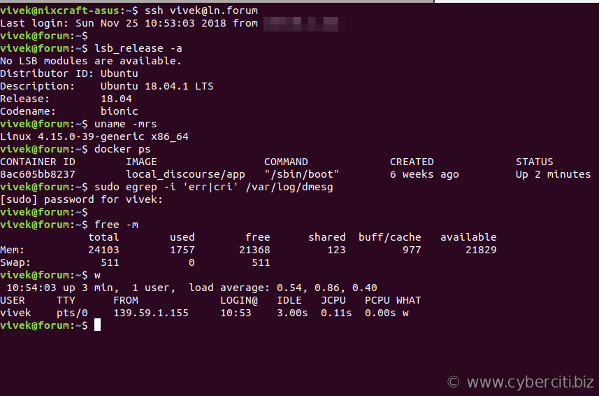
Verification
First login using the ssh command:
$ ssh user@your-ubuntu-server
Then verify Ubuntu Linux kernel version with uname:
$ uname -r
Don’t forget to check whether all needed ports are open and running with the ss command or netstat command:
$ sudo ss -tulpn
$ sudo netstat -tulpn
You can use grep command/egrep command or tail command/cat command to verify log files for any errors:
$ dmesg
$ tail -f /path/to/log/files
$ egrep -i 'err|cri' /var/log/nginx/error.log
 Remove tcp port 1022 added Ubuntu VM via ufw
Finally, run the below command:
$ sudo ufw delete allow 1022/tcp
Well done! You have successfully upgraded Ubuntu Linux v16.04 LTS to v18.04 LTS on the cloud server.
 Remove tcp port 1022 added Ubuntu VM via ufw