Moving to a new server or host is a threatening work for both WordPress beginner as well as an experienced user. This is a completely different experience than implementing a new site. Hence, many users may have different problems on how to move WordPress to a new server or host successfully. This article brings you a step by step guidance on how to do it in a simple and understandable way. Basically users have to perform six steps to do this work successfully. The article has described those six steps in a detailed form as below.
How to move WordPress to a new server or host With no downtime
Step 01 – Duplicate the site
Initially, you have to create a backup of the WordPress site. This is the first task you should perform when you plan to move WordPress to a new server. The benefit of keeping backup is that you can restore it to the new host easily. There are several ways that are available for users to do it. You can obtain the service from companies that perform this process for you and as well as different plugins also there to do it.
However, Duplicator’s solution can be introduced as the best solution among other solutions due to some benefits. This is a WordPress plugin. You can use this on all hosts and it is freely available for you. Also, it does work hiccup-free. Users can work on it simply and it belongs much good press on the web.

You can do the installation process of the Duplicator plugin as describe below finely.
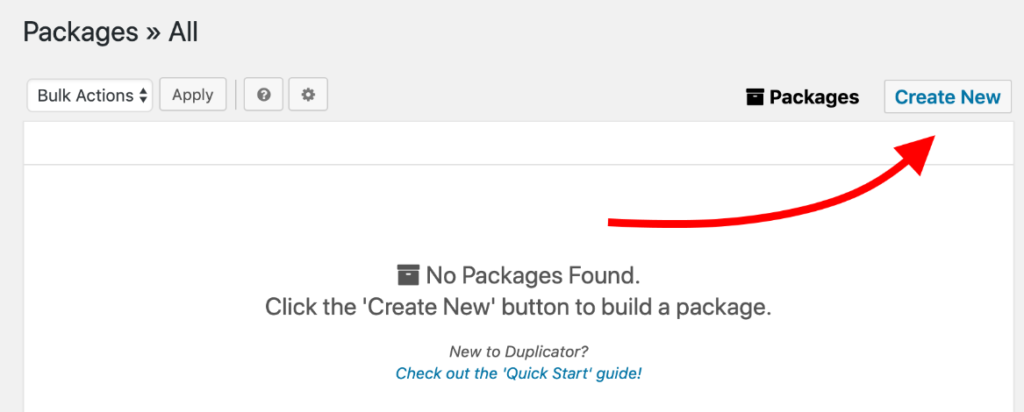
- Click on the Create New button next to Packages in the Duplicator plugin.
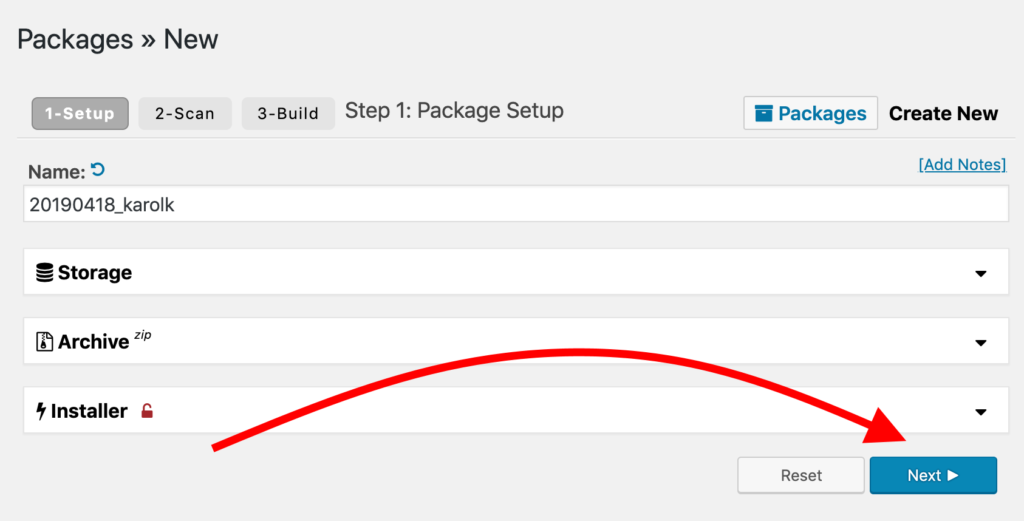
- Then you can review the parameters of the backup if you want on the next screen and then click on Next.
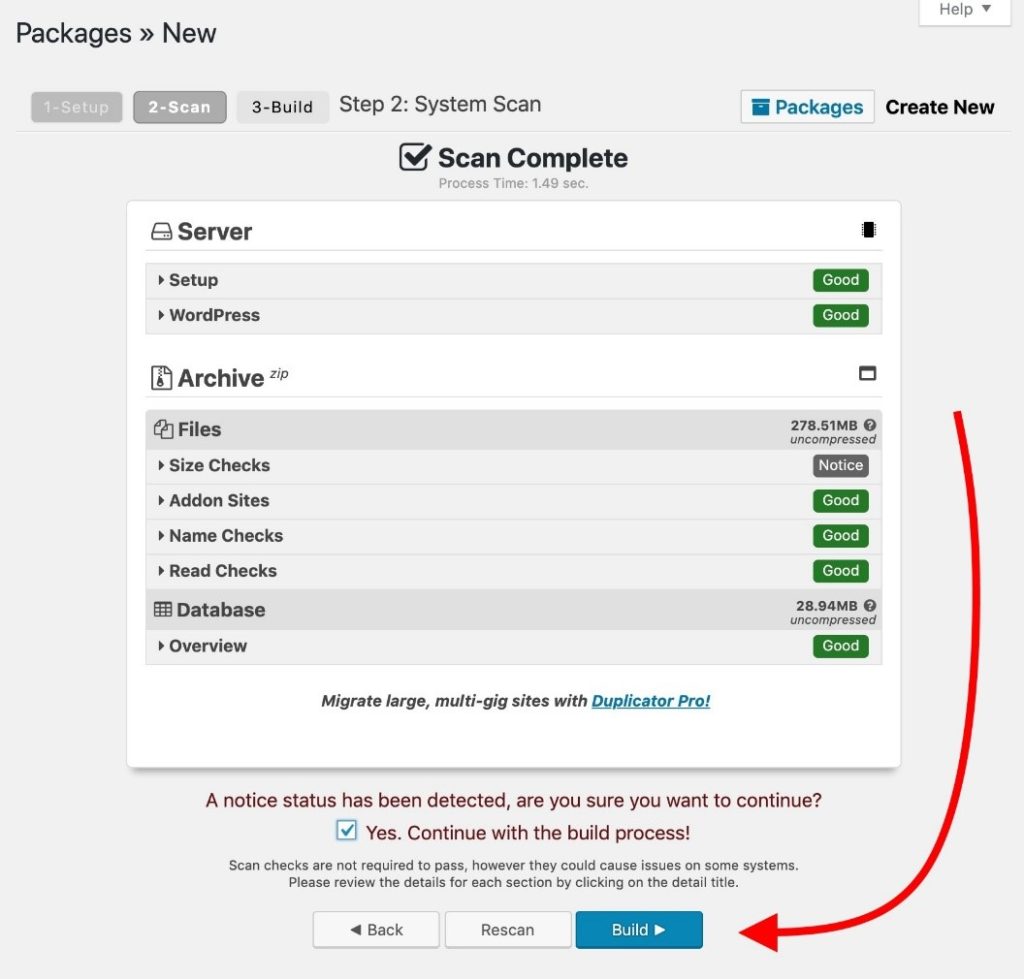
- In the next section, the Duplicate plugin scans through your current hosting settings to evaluate how compatible that configuration is, allowing you to perform backups without hassle. Here, you may see a notice. If so, check the Yes field and then click on the Build button.
- If you do not receive a notice, you can click on the Build button.
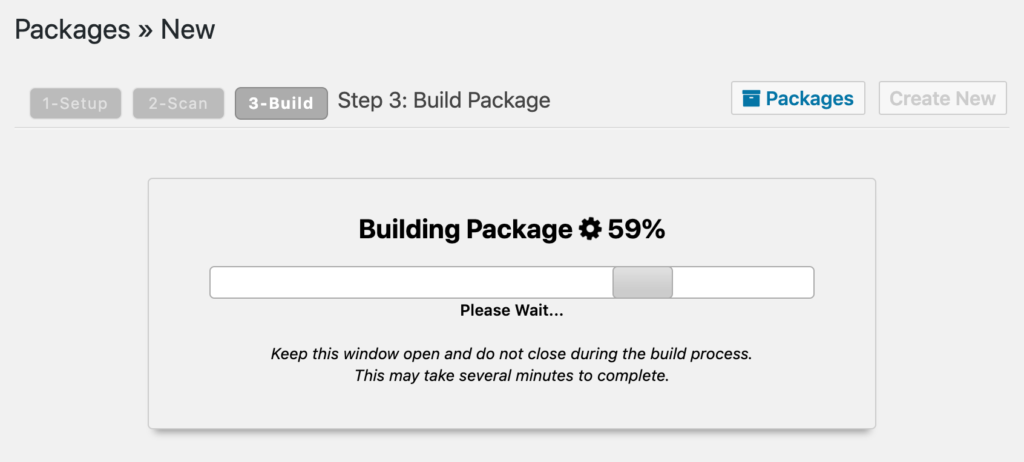
- The backup process will start and you have to keep the window open until it finishes.
- You will appear a confirmation screen as shown below after the backup process ended.
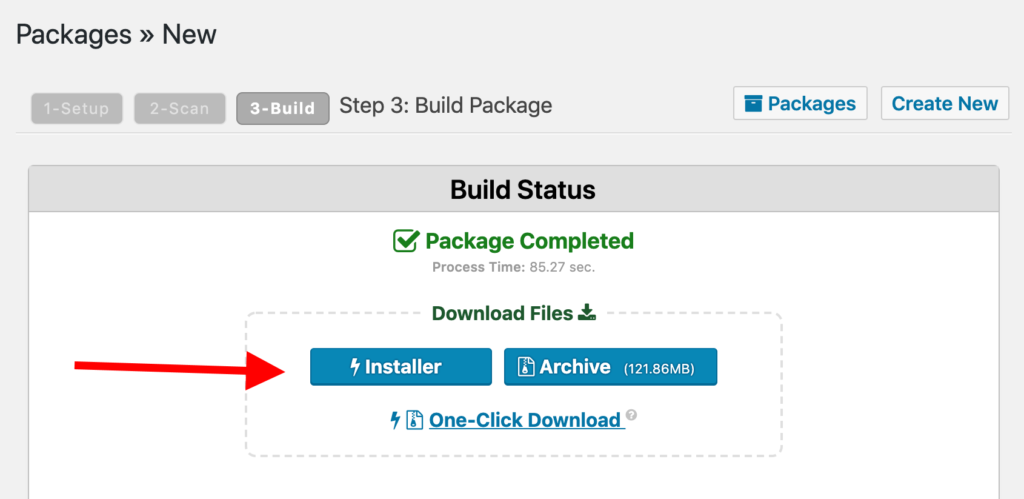
- Download the installer file and archive including the backup.
- This backup requires you when you are moving WordPress to a new server.
Step 02 – Get the new host ready
Before restoring back up to your new host, you need to take a few steps to prepare for it. You have to do the following tasks :
- Add the domain name to the server.
- Create a blank database for the site.
- Duplicate the email addresses. This is optional.
You can ask the support from the new host provider if your new host uses a different management panel. Then they can handle the above three tasks for you. Because many web hosts use cPanel users to set up the hosting environment. But they have not a clear understanding of what’s going on under the hood.
The host will give login details to cPanel during signup. You can find it in your email inbox. Otherwise, the host will allow you directly to go to cPanel from the main client area. After you can access the cPanel, you can do the below steps.
Add your domain name to the new server
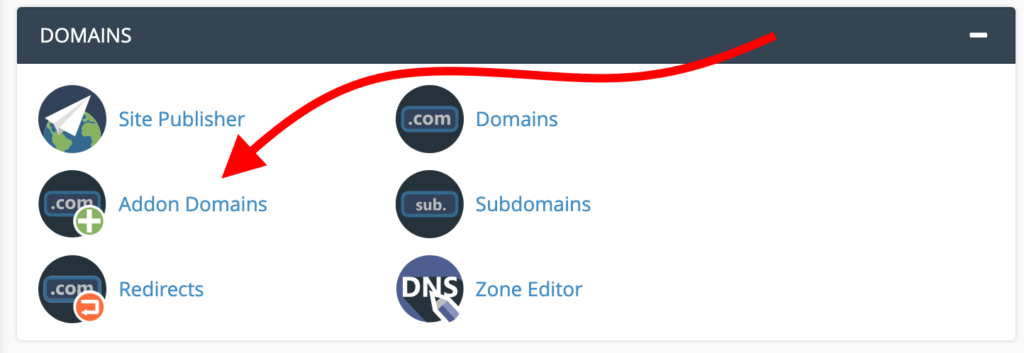
- Go for the Domain section.
- Click on Addon Domains as shown below.
- Enter your domain name in the New Domain Name field.
- The other two fields will be filled out automatically.
- Click on Add Domain.

- Then you can see the new domain on the list.
- The server is ready to welcome the domain name and website now.

Create a new database
The second thing you have to do is to create a new database. So, it will be the new place for your site’s data. You have to do the below things to add a new database in cPanel.
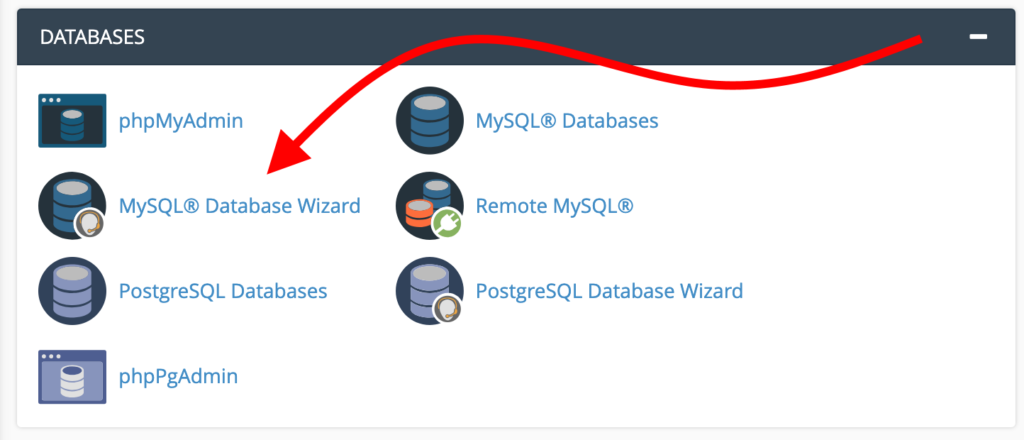
- Go for the Database section.
- Click on MySQL Database Wizard.
- Now you have to go on a process to set up the new database as below.
- Step 01 – Pick a name for the database.

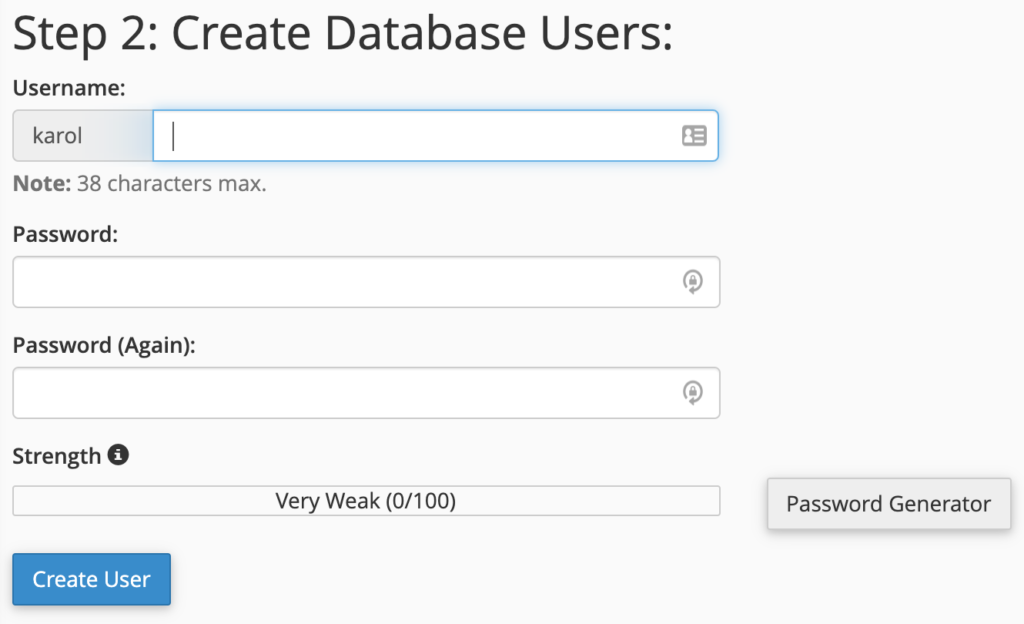
- Step 02 – Create user accounts.
You can obtain access to the database after you create the user accounts. So this is how WordPress accesses the database back and forth. You have to enter the required details in the fields. Make sure that you have noted down the login and password.
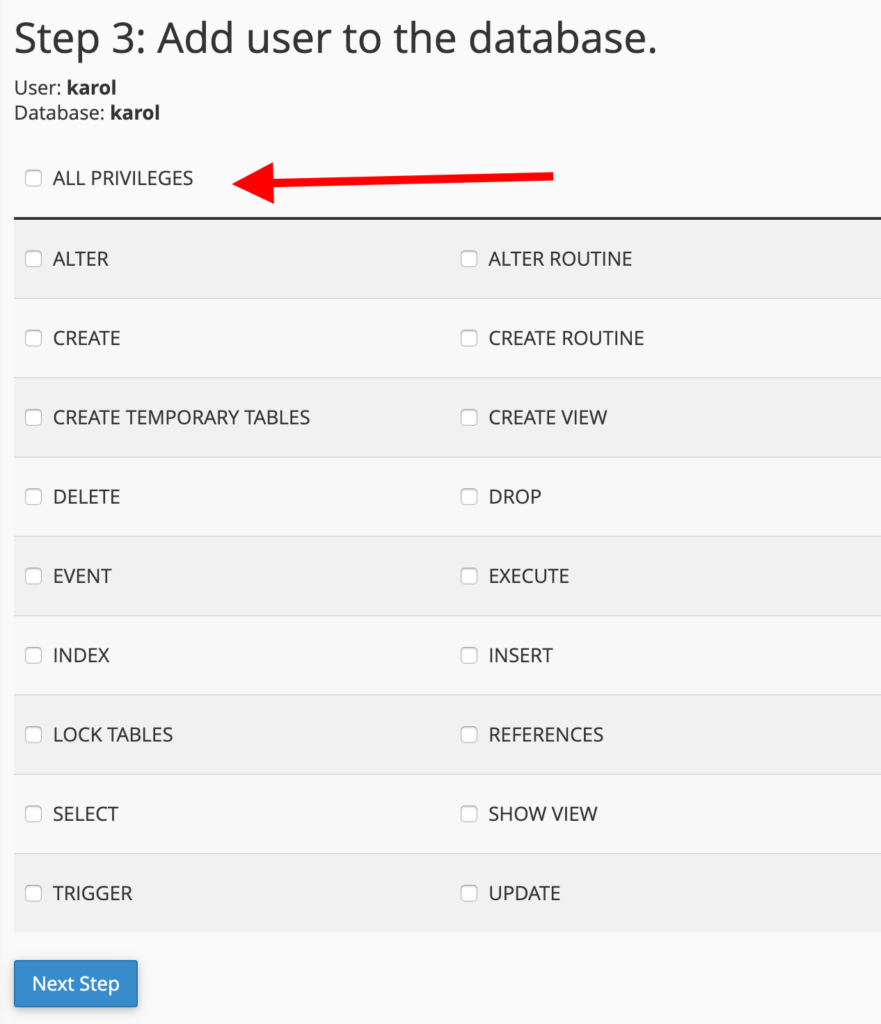
For that, you have to select All Privileges and then click on the Next step. The new database will be created now.
Move the email address to the new server (This is not compulsory.)
Many users have an email set up under the domain name. If so, you can refer below points. Otherwise, you can skip to the next step. You move your domain name to the new host also when you try to move WordPress to the new server. You have to do it correctly. Then all of your emails will start arriving from the new host. However, if you do not set up your email to the new host correctly, then those emails will be lost or be marked as “undelivered: the recipient doesn’t exist”.

However, you can fix this issue simply. You have to go through the below steps.
- Click on the + Create button on the right.
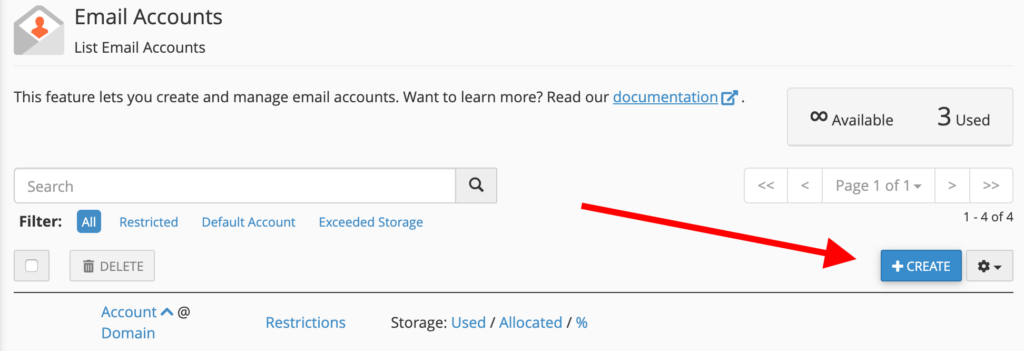
- Add the existing email addresses to the new server. Below is the form you have to fill and you can refer the instructions.
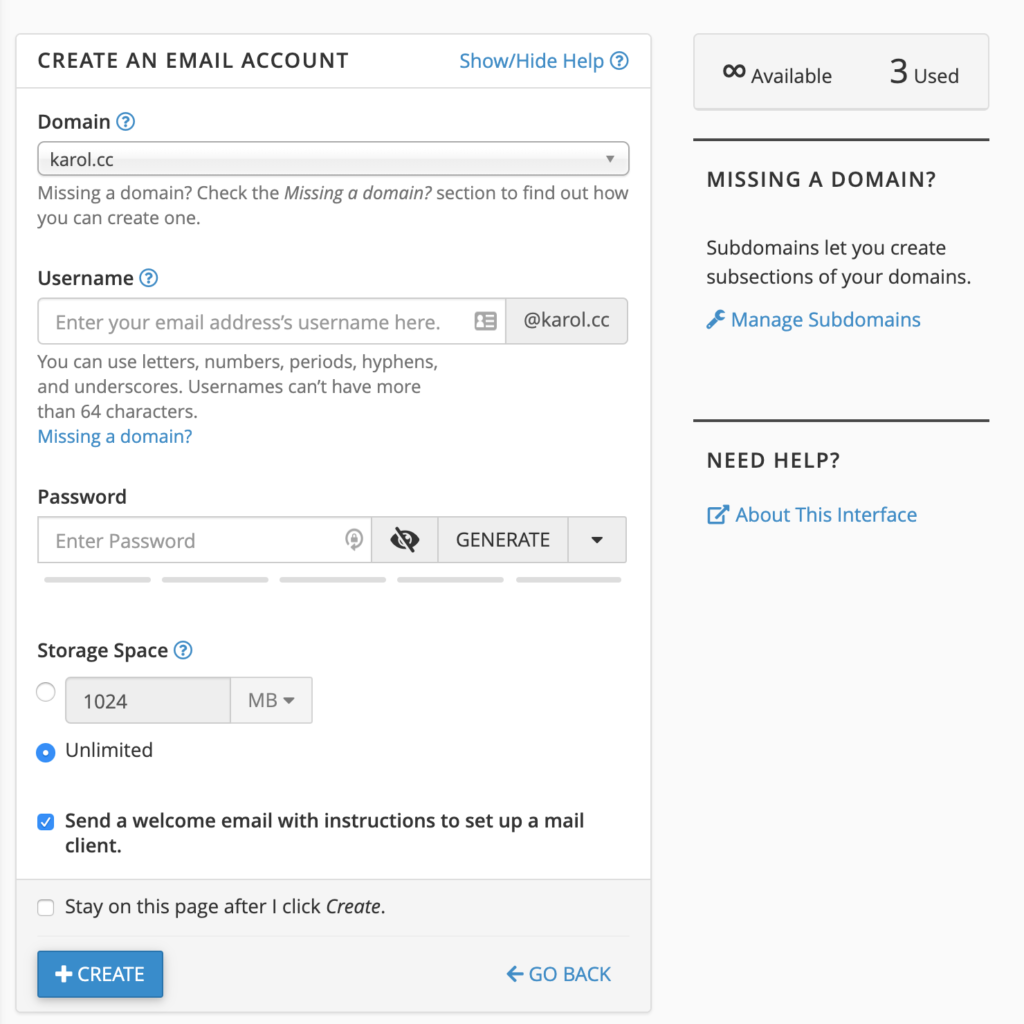
- Domain – Select the new domain name.
- Username – Enter the same username which is used in the previous host.
- Password – Enter a password. You can use a new one or the previous one.
- Storage Space – It is better to set this as unlimited.
- If you have filled out the form, click on + Create button.
If you have more than one email set on the previous host, You can follow the above process for each one.

As shown above, the new host is ready to welcome a new email addressed to your domain now.
Step 03 – Upload the site to the new host
Firstly, the domain name, database, and email should be arranged to upload the entire site back up to the new server. You have to do the below tasks to do it.
- Scroll down the Files section in cPanel.
- Click on File Manager.

- Go to the directory which is created for the new domain name.
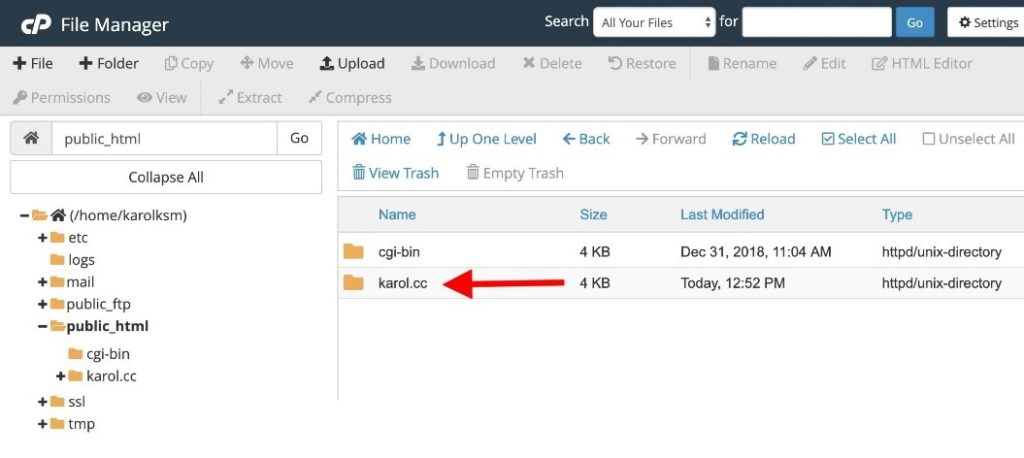
- Upload the site’s archive which is got from Duplicator.
- Upload both the archive (zip) and the installer.php file. This is the directory that ends up when moving WordPress to a new server.

Step 04 – Edit the local host’s file
Now you are ready to do the final import of the WordPress site and transfer all files and data. Before doing that, you need to check whether you have access to the new server via the browser from your PC. Normally, it works finely. But the domain has not redirected to the new server officially. It has to do at the last moment to avoid any downtime.
The important fact is that the new server should be invisible to the public including the owner. In other words, It is not directly accessible to anyone. You can ensure this by manually configuring your computer to go to the new server while searching your web domain. Below are the steps you can do it.
- Go back to cPanel and note the new server’s IP address.
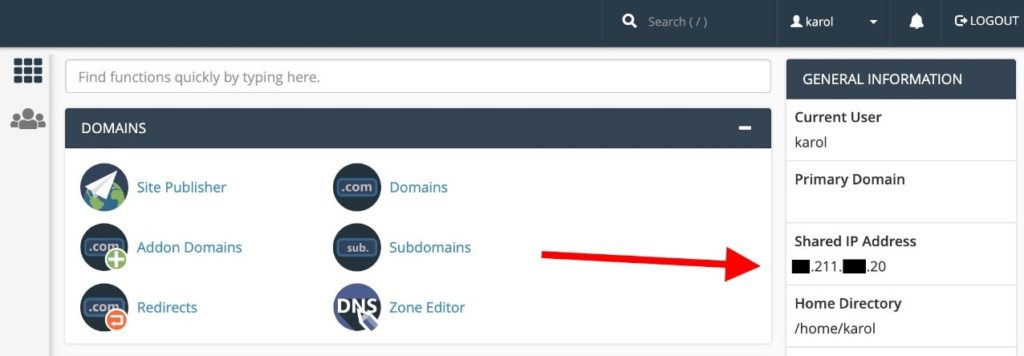
After all, done, you will able to access directly to the new server when you try to navigate the site from the browser.
Step 05 – Install site via the online installer
- Go to the browser and navigate to YOURDOMAIN.COM/installer.php.
- Accept the terms in the main interface of the installer.
- Click on Next. You will appear below the popup message.

- Click on Next to proceed and confirm the popup message to run the installer.
- Click the Next on the next screen and confirm the site title and URL.
- The installation process will be complete and you will receive the final confirmation message as shown below.

Then it is better to check the box labeled “Auto delete installer files”
- Click on Admin Login. You can access the WordPress dashboard of the site on the new host.
- See a confirmation that the installer files have been removed.
- You can deactivate/delete the Duplicator plugin. Because it is not required now.
- You can see the website on the new server when navigating to YOURDOMAIN.com.
Step 06 – Redirect the domain name
When you come to step six, the website has been migrated to the new server completely. So, in the final step, the task you have to do is to inform the web to search in the new server when searching your site instead of the previous one. You can do it simply by editing the nameservers assigned in the domain name setup. You have to read the below points to do it carefully.
- Go back to where you registered the domain in the first place.
- Change nameserver settings. Here you have to give the DNS addresses of the new nameservers which are given in the new host. You can find it from the new host’s user panel.
- For instance, you can find the DNS address at SiteGround by clicking on My Accounts and then for Information & Settings tab. There you can find account DNS as shown below.
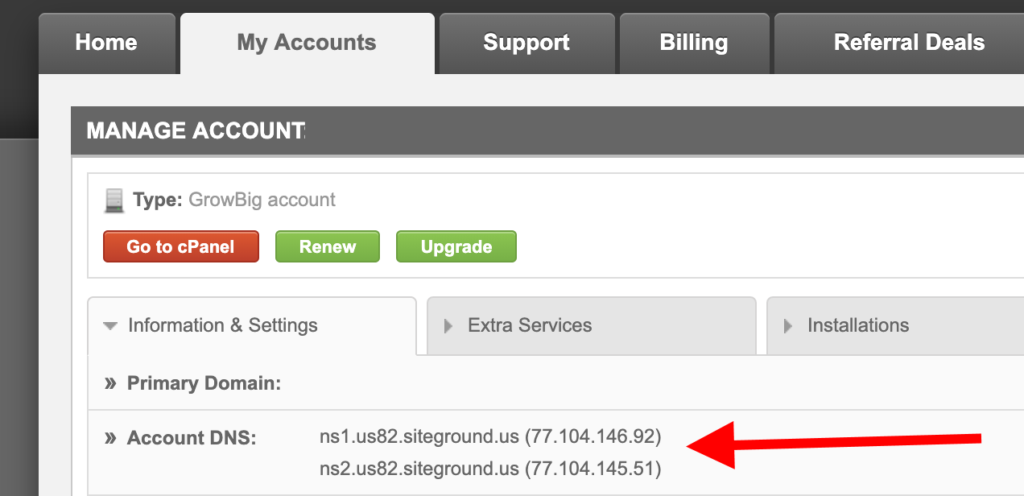
In Bluehost, they use the same DNS addresses for all websites. Then you can find them simply from here.
However, if you cannot find it, you can get support from your new host. As well as, below are some tutorials on how to change the nameserver settings for your reference.
- How to change domain nameservers with GoDaddy
- How to change domain nameservers with Bluehost
- How to change domain nameservers with Namecheap
- How to change domain nameservers with SiteGround
It will take some time after you set the DNS settings of the domain to point to the new server. You will have to wait nearly 48 hours until it propagates throughout the entire web.
What’s next after you move WordPress to a new server?
- Delete the additional entries in the host file which you made during the migration.
- Check the email configuration. The email address will same. But the actual details of the configuration may have changed.
- Check whether you are getting emails by sending test mails from another email address. If it not work, you have to check with the new host and get instructions to set up email software correctly.
- Enter the connection details of the new database as shown below.

- The host value should be set to localhost. Then click on Test Database when you filled all the fields.

This article brings you a detailed guide on how to move WordPress to a new server or host. It has explained six steps in a simple manner and you can refer easily and apply them.
Connect with us
We would like to hear about your problems, questions, and suggestions. So feel free to contact us. This is free of charge service that we offer. But we receive thousands of emails per day. So it is impossible to reply to all of them. So we create a Community to help you individually. Go to Community and open help Topic under the relevant category. Please spread this post to your friends by sharing Facebook and other major social media. And make sure to like us on Facebook.
Read more: How to Fix a 502 Bad Gateway Error in WordPress
How to Fix the Image Upload Issue in WordPress
How to Install a WordPress Plugin