Why I want to Flash Stock Firmware
You have to Flash your Android Device under various circumstances. If you Flashed custom ROM or Custom recovery or performed root on your device and now you want to Unroot, Unbrick, Rollback, back to Stock Firmware. or if you want to Upgrade or Downgrade your Android Device OS then you will need to flash the stock firmware. Furthermore, if you got errors like the Black Screen of Death issue, Boot loop issue, massive lags, soft bricks, overheating, unexpectedly shut down then you have to perform this operation to bring your device back to its original state. Read More – Stock Rom vs Stock Firmware
Requirements for Flashing :
- Read More – Increase RAM SIZE after root on Device?
- Download the Stock Firmware for your device.
- Download latest Odin flash tool
- Use Original USB cable and working laptop.
- Maintain at least 60% of the battery percentage.
- Enable USB debugging and OEM unlock
- Beginner Guide for Odin Flash Tool ( BGOF )- Please Read this and go to Flashing Operation.
Preparation for Flashing Stock Firmware on [name]
Step #1
- Download Samsung USB Driver and install it to Your Computer. If you already install USB Drivers, then skip this Step.
Step #2
- Download Odin Flash Tool and Extract it to Your Computer

Step #3
- Download Stock Firmware for your [name] (Just type Model Name and Download ) and Extract it to your Computer.
Step #4
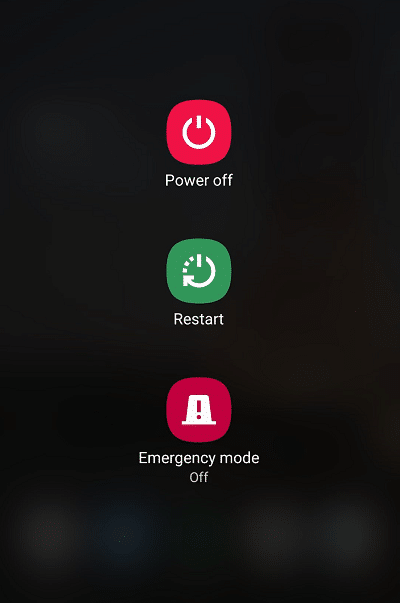
- Turn Off your [name] Device
Step #5
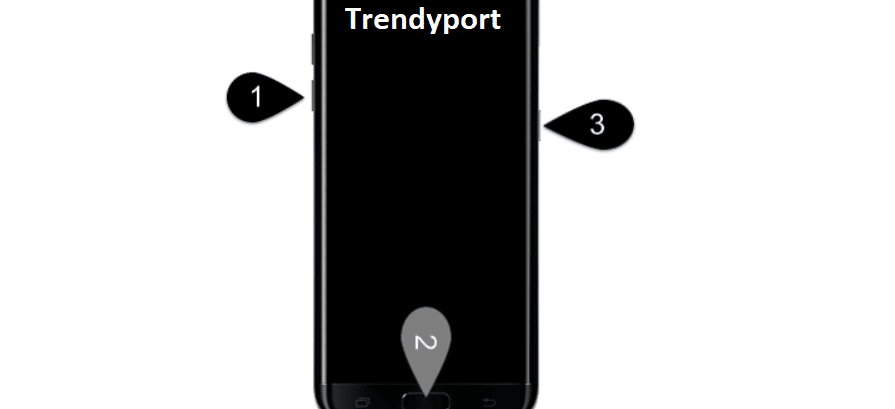
- Now you can Boot to Download Mode. to boot Download Mode, Press and Hold Volume Down +Power + Home Key at the same time for 6-10 Seconds
Step #6
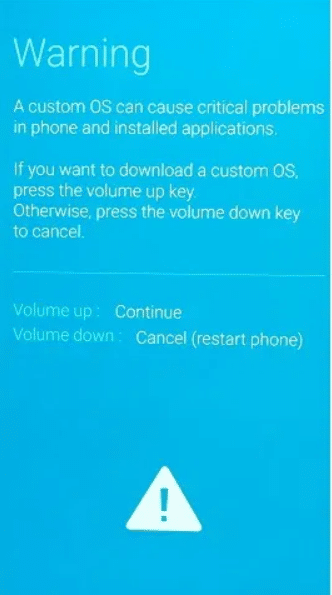
- If you have booted into Download Mode successfully, You can see Warning Triangle on the Screen.
Step #7
- Open Odin Tool from Computer (You have Downloaded it in Step #2 )
- And Connect Your [name] to Computer using Original USB Cable
- Press the Volume up button to Continue.

Step #8
- Once [name] is connected to Computer, Odin will Automatically Detect and Display message “Added” in Odin Log area

Step #9
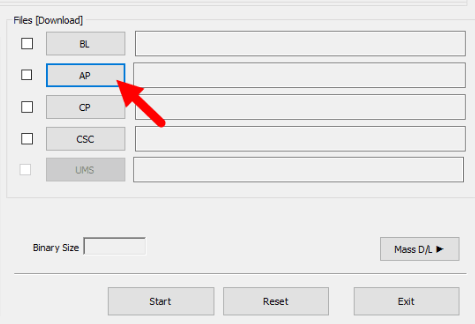
Click AP Button and select AP file from Downloaded Firmware Folder.
Step #10
- Now, we can start Flashing Process. Click the “Start Button” to Begin Flashing Process. This process may take 10 Min to fully complete.
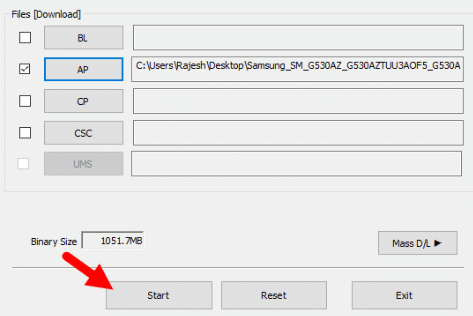
- After Flashing Process complete, Odin will indicate the Green “Pass” message. now you can disconnect your Device from Computer.

- You will see your Device is getting Restarting. if not, Restart the device manually.
Step #11 (OPtional)
- Factory reset your [name] device and make sure all is well
“EXT4 image error” / hidden.img.ext4”

“Invalid EXT4 image” can occur when flashing a device. Before we dive deeper into the solution of this error, let us first know about this error. Because before we begin to deal with it, it is better to know what we are dealing with More Details
Connect with us
We would like to hear your problems, questions, and suggestions.so feel free to contact us. this is free of charge service that we offer. but we receive thousands of emails per day. so it is impossible to reply to all of them. so we create a Community to help you individually. go to Community and open help Topic under Android. please spread this post to your friends by sharing Facebook and other major social media. and make sure to like us on Facebook.